Kodak Easyshare CX7430 zoom digital camera - Foto Source ...
Kodak Easyshare CX7430 zoom digital camera - Foto Source ...
Kodak Easyshare CX7430 zoom digital camera - Foto Source ...

Create successful ePaper yourself
Turn your PDF publications into a flip-book with our unique Google optimized e-Paper software.
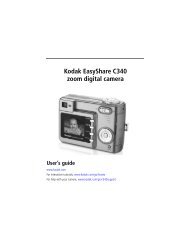
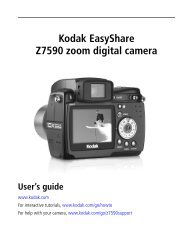
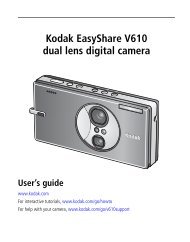
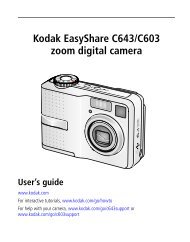
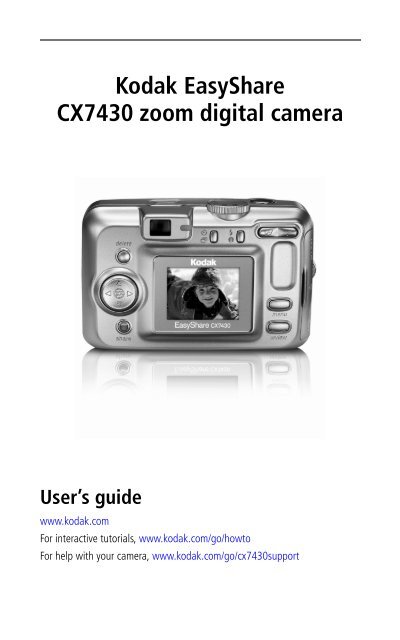
<strong>Kodak</strong> EasyShare<br />
<strong>CX7430</strong> <strong>zoom</strong> <strong>digital</strong> <strong>camera</strong><br />
User’s guide<br />
www.kodak.com<br />
For interactive tutorials, www.kodak.com/go/howto<br />
For help with your <strong>camera</strong>, www.kodak.com/go/cx7430support
Eastman <strong>Kodak</strong> Company<br />
343 State Street<br />
Rochester, New York 14650<br />
© Eastman <strong>Kodak</strong> Company, 2003<br />
All screen images are simulated.<br />
<strong>Kodak</strong> and EasyShare are trademarks of Eastman <strong>Kodak</strong> Company.<br />
P/N 6B8807
Front View<br />
5<br />
4<br />
1 Microphone 6 Shutter button<br />
2 Light sensor 7 Mode dial/Power<br />
3 Self Timer/Video light 8 Speaker<br />
4 Wrist strap post 9 Flash unit<br />
5 Grip 10 Viewfinder<br />
Side View<br />
6<br />
7<br />
11 Lens/Lens cover<br />
1 A/V Out, for television viewing<br />
2 Slot for optional SD/MMC card<br />
3 USB Port<br />
8<br />
3 2 1<br />
9<br />
10<br />
1<br />
2<br />
3<br />
11<br />
Product features<br />
i
Product features<br />
Back View<br />
1 Camera screen (LCD) 8 Ready light<br />
2 Share button 9 Self Timer/Burst button<br />
3 OK button (press) 10 Flash/status button<br />
4 4-way controller 11 Zoom (Wide Angle/Telephoto)<br />
5 DC-In (3V) ,for optional AC adapter 12 Grip<br />
6 Delete button 13 Menu button<br />
7 Viewfinder 14 Review button<br />
ii<br />
7<br />
6<br />
5<br />
4<br />
3<br />
2<br />
8<br />
9<br />
1<br />
10<br />
11<br />
12<br />
13<br />
14
Top and Bottom Views<br />
Top Bottom<br />
5<br />
Product features<br />
1 Speaker 5 Locator for EasyShare <strong>camera</strong> dock or printer dock<br />
2 Power light 6 Dock connector<br />
6<br />
1<br />
3 Mode dial/Power 7 Tripod socket/locator for EasyShare <strong>camera</strong> dock or<br />
printer dock<br />
4 Shutter button 8 Battery door<br />
2<br />
7<br />
3<br />
8<br />
4<br />
iii
iv<br />
1 Table of contents<br />
1 Getting started ........................................................................... 1<br />
Package contents.............................................................................. 1<br />
Installing the software first ................................................................ 1<br />
Loading the batteries ........................................................................ 2<br />
Important battery information ........................................................... 3<br />
Turning the <strong>camera</strong> on and off .......................................................... 4<br />
Setting the date and time.................................................................. 5<br />
Checking <strong>camera</strong> and picture status .................................................. 6<br />
Storing pictures on an SD/MMC card ................................................. 7<br />
2 Taking pictures and videos ......................................................... 8<br />
Taking a picture ................................................................................ 8<br />
Taking a video .................................................................................. 8<br />
Camera modes.................................................................................. 9<br />
Using the <strong>camera</strong> screen as a viewfinder ......................................... 10<br />
Reviewing the picture or video just taken......................................... 12<br />
Using optical <strong>zoom</strong> ......................................................................... 13<br />
Using <strong>digital</strong> <strong>zoom</strong> .......................................................................... 13<br />
Using the flash................................................................................ 14<br />
Putting yourself in the picture.......................................................... 16<br />
Putting yourself in the video ............................................................ 16<br />
Taking a burst series of pictures....................................................... 17<br />
Changing picture-taking settings ..................................................... 18<br />
Customizing your <strong>camera</strong> ................................................................ 21<br />
Pre-tagging for album names .......................................................... 23<br />
3 Reviewing pictures and videos ................................................. 24<br />
Viewing single pictures and videos .................................................. 24<br />
Viewing multiple pictures and videos............................................... 24<br />
Playing a video................................................................................ 25<br />
Deleting pictures and videos............................................................ 25<br />
Changing optional review settings................................................... 26<br />
Magnifying pictures......................................................................... 26<br />
Protecting pictures and videos from deletion.................................... 27<br />
Tagging pictures/videos for albums.................................................. 27<br />
Running a slide show ...................................................................... 28<br />
Copying pictures and videos............................................................ 30<br />
Viewing picture/video information ................................................... 30
Table of contents<br />
4 Installing the software ............................................................. 31<br />
Minimum system requirements ........................................................ 31<br />
Install the software ......................................................................... 32<br />
5 Sharing pictures and videos ..................................................... 33<br />
When can I tag my pictures and videos? .......................................... 33<br />
Tagging pictures for printing............................................................ 34<br />
Tagging pictures and videos for emailing ......................................... 35<br />
Tagging pictures as favorites ........................................................... 36<br />
6 Connecting <strong>camera</strong> to computer .............................................. 38<br />
Transferring pictures with the USB cable.......................................... 38<br />
Printing pictures from your computer ............................................... 39<br />
Ordering prints online ..................................................................... 39<br />
Printing from an optional SD/MMC card .......................................... 39<br />
Printing without a computer............................................................ 39<br />
7 Troubleshooting ....................................................................... 40<br />
Camera problems............................................................................ 40<br />
Camera screen messages ................................................................ 43<br />
Camera ready light status................................................................ 46<br />
8 Getting help ............................................................................. 47<br />
Helpful links.................................................................................... 47<br />
Software help.................................................................................. 47<br />
Telephone customer support ........................................................... 47<br />
9 Appendix .................................................................................. 49<br />
Camera specifications ..................................................................... 49<br />
Tips, safety, maintenance ................................................................ 51<br />
Storage capacities ........................................................................... 51<br />
Power-saving features..................................................................... 52<br />
Upgrading your software and firmware............................................ 52<br />
Regulatory compliance .................................................................... 53<br />
v
1<br />
1 Getting started<br />
Package contents<br />
1<br />
2<br />
3<br />
1 Camera with wrist strap 4 USB cable<br />
2 Custom dock insert (for EasyShare<br />
<strong>camera</strong> dock or printer dock)<br />
3 2 AA non-rechargeable starter<br />
batteries<br />
Not shown: User’s guide (may be provided on a CD), Start Here! guide,<br />
<strong>Kodak</strong> EasyShare software CD. Contents may change without notice.<br />
Installing the software first<br />
5 Audio/Video cable (for viewing<br />
pictures and videos on television)<br />
IMPORTANT: Install the software from the <strong>Kodak</strong> EasyShare software CD before<br />
connecting the <strong>camera</strong> (or dock) to the computer. Otherwise, the<br />
software may load incorrectly. See the Start Here! guide or<br />
Installing the software, page 31.<br />
4<br />
5
Loading the batteries<br />
Getting started<br />
Two AA non-rechargeable starter batteries are included with your <strong>camera</strong>. For<br />
information on replacing batteries and extending battery life, see page 3.<br />
1 Turn the Mode dial to Off.<br />
2 On the bottom of the <strong>camera</strong>, slide the battery<br />
door and lift to open.<br />
3 Insert the AA batteries as shown.<br />
4 Close the battery door.<br />
If you purchased an optional <strong>Kodak</strong> EasyShare<br />
Ni-MH rechargeable battery pack (also<br />
included with the <strong>Kodak</strong> EasyShare <strong>camera</strong><br />
dock or printer dock), insert it as shown.<br />
If you purchased an optional <strong>Kodak</strong> CRV3<br />
lithium battery (non-rechargeable), insert it as<br />
shown.<br />
See <strong>Kodak</strong> battery replacement types/battery<br />
life for the other types of batteries you can use<br />
in your <strong>camera</strong>.<br />
2
Getting started<br />
Important battery information<br />
<strong>Kodak</strong> battery replacement types/battery life<br />
Use the following types of batteries. Actual battery life may vary based on<br />
usage.<br />
We do not recommend or support alkaline batteries. For acceptable<br />
battery life, and to make sure your <strong>camera</strong> operates dependably, use the<br />
replacement batteries listed above.<br />
Extending battery life<br />
■ Limit the following activities that quickly deplete battery power:<br />
3<br />
CRV3 lithium battery<br />
AA (2) lithium batteries<br />
Ni-MH rechargeable battery<br />
pack* (per charge)<br />
AA (2) Ni-MH rechargeable<br />
batteries (per charge)<br />
AA (2) non-rechargeable<br />
150 - 250<br />
<strong>Kodak</strong> <strong>digital</strong> starter batteries<br />
(included with <strong>camera</strong>)<br />
0 500<br />
Battery Life (Approx. number of pictures)<br />
– Reviewing your pictures on the <strong>camera</strong> screen (see page 24)<br />
– Using the <strong>camera</strong> screen as a viewfinder (see page 10)<br />
– Excessive use of the flash<br />
200 - 300<br />
200 - 300<br />
250 - 350<br />
* Included with the <strong>Kodak</strong> EasyShare <strong>camera</strong> dock and printer dock<br />
350 - 500<br />
■ Dirt on the battery contacts can affect battery life. Wipe the contacts with a<br />
clean, dry cloth before loading batteries in the <strong>camera</strong>.<br />
■ Battery performance is reduced at temperatures below 41° F (5° C). When<br />
using your <strong>camera</strong> in cold weather, carry spare batteries and keep them<br />
warm. Do not discard cold batteries that do not work; when they return to<br />
room temperature, they may be usable.
Visit www.kodak.com/go/cx7430accessories for:<br />
Getting started<br />
<strong>Kodak</strong> EasyShare <strong>camera</strong> dock—powers your <strong>camera</strong>, transfers pictures<br />
to your computer, and charges the included <strong>Kodak</strong> EasyShare Ni-MH<br />
rechargeable battery pack.<br />
<strong>Kodak</strong> EasyShare printer dock—powers your <strong>camera</strong>, makes<br />
4 x 6 prints with or without a computer, transfers pictures, and charges the<br />
included <strong>Kodak</strong> EasyShare Ni-MH rechargeable battery pack.<br />
<strong>Kodak</strong> 3-volt AC adapter—powers your <strong>camera</strong><br />
IMPORTANT: Do not use a 5-volt AC adapter (included with the <strong>Kodak</strong> EasyShare<br />
<strong>camera</strong> dock or printer dock) to power your <strong>camera</strong>.<br />
For more information on batteries, see<br />
www.kodak.com/global/en/service/batteries/batteryUsage.jhtml<br />
Battery safety and handling<br />
■ Do not allow batteries to touch metal objects, including coins. Otherwise, a<br />
battery may short circuit, discharge energy, become hot, or leak.<br />
■ For rechargeable battery disposal information, see the Rechargeable<br />
Battery Recycling Corporation Web site at www.rbrc.com.<br />
Turning the <strong>camera</strong> on and off<br />
■ Turn the Mode dial from Off to any other<br />
position.<br />
The Power light turns on. The Ready light blinks<br />
green while the <strong>camera</strong> performs a self-check,<br />
then turns off when the <strong>camera</strong> is ready.<br />
■ To turn off the <strong>camera</strong>, turn the Mode dial to<br />
Off.<br />
The <strong>camera</strong> completes operations that<br />
are in process.<br />
4
Getting started<br />
Changing the display<br />
If you want to Then do this<br />
Turn the <strong>camera</strong> screen on or off. Press the OK button.<br />
Change the <strong>camera</strong> screen setting so<br />
that it is on whenever the <strong>camera</strong> is on.<br />
See Liveview, page 21.<br />
Show/Hide the status icons. Press .<br />
Setting the date and time<br />
Setting the date & time, first time<br />
The Date and Time have been reset message appears the first time you<br />
turn on the <strong>camera</strong> or if the battery is removed for an extended time.<br />
1 SET DATE & TIME is highlighted. Press the OK button.<br />
5<br />
(Select Cancel to set the date and time at a later time.)<br />
2 Go to step 4 below, Setting the date & time, anytime.<br />
Setting the date & time, anytime<br />
1 Turn on the <strong>camera</strong>. Press the Menu button.<br />
2 Press to highlight Setup Menu, then press the OK button.<br />
3 Press to highlight Date & Time , then press the OK button.<br />
4 Press to adjust the date and time. Press to advance to the next<br />
setting.<br />
5 When finished, press the OK button.<br />
6 Press the Menu button to exit the menu.<br />
NOTE: Depending on your computer operating system, <strong>Kodak</strong> EasyShare software may let your<br />
computer update the <strong>camera</strong> clock when you connect the <strong>camera</strong>. See the EasyShare<br />
software Help for details.
Checking <strong>camera</strong> and picture status<br />
Getting started<br />
The icons that appear on the <strong>camera</strong> screen indicate the active <strong>camera</strong> and<br />
picture settings. If is displayed in the status area, press the Flash/Status<br />
button to display additional settings. Press to show/hide the status icons.<br />
Capture mode screen<br />
Only the active <strong>camera</strong> settings are displayed:<br />
Self Timer/Burst<br />
Date stamp<br />
Album name<br />
Mode<br />
description<br />
Zoom<br />
<strong>digital</strong><br />
telephoto<br />
wide<br />
Review screen<br />
Scroll arrows<br />
Flash<br />
Picture/video quality<br />
Pictures/time remaining<br />
Storage location<br />
Exposure<br />
metering<br />
White balance<br />
ISO<br />
Camera mode<br />
Low battery<br />
(flashing = exhausted)<br />
Exposure compensation<br />
Print tag/number of prints Protect<br />
Favorite tag<br />
Picture/video number<br />
Email tag<br />
Image storage<br />
location<br />
Scroll arrows<br />
Review mode<br />
6
Getting started<br />
Flash/Status screen<br />
Press the Flash/Status button. The current <strong>camera</strong> status icons are displayed in<br />
the bottom half of the Flash screen.<br />
Storing pictures on an SD/MMC card<br />
Your <strong>camera</strong> has 16 MB of internal memory. You can purchase optional<br />
SD/MMC cards for removable, reusable storage for your pictures and videos.<br />
7<br />
Other settings<br />
CAUTION:<br />
The card can only be inserted one way; forcing it may<br />
damage the <strong>camera</strong> or card.<br />
Do not insert or remove a card when the green ready light<br />
is blinking; doing so may damage your pictures, card, or<br />
<strong>camera</strong>.<br />
To insert an SD/MMC card:<br />
Notched<br />
corner<br />
1 Turn off the <strong>camera</strong>.<br />
2 Open the card door.<br />
3 Orient the card as shown on the <strong>camera</strong> body.<br />
4 Push the card into the slot to seat the<br />
connector.<br />
5 Close the door.<br />
To remove the card, turn off the <strong>camera</strong>. Push the card in, then release it.<br />
When the card is partially ejected, pull it out.<br />
See page 51 for storage capacities. Purchase SD/MMC cards at a dealer of<br />
<strong>Kodak</strong> products or www.kodak.com/go/cx7430accessories.
2 Taking pictures and videos<br />
Taking a picture<br />
1 Turn the Mode dial to the mode you want to use. See page 9 for mode<br />
descriptions.<br />
The <strong>camera</strong> screen displays the mode name and description. To interrupt the<br />
description, press any button.<br />
2 Use the viewfinder or <strong>camera</strong> screen to frame your subject. (Press the OK<br />
button to turn the <strong>camera</strong> screen on. See page 10.)<br />
Taking a video<br />
1 Turn the Mode dial to Video .<br />
3 Press the Shutter button halfway to set the<br />
exposure and focus.<br />
4 When the ready light turns green, continue<br />
pressing the Shutter button completely<br />
down to take the picture.<br />
When the ready light blinks green, the picture is<br />
being saved; you can still take pictures. If the<br />
ready light is red, wait until it turns green.<br />
2 Use the viewfinder or <strong>camera</strong> screen to frame your subject.<br />
3 Press the Shutter button completely down and release. To stop recording,<br />
press and release the Shutter button again.<br />
NOTE: If you prefer, press the Shutter button completely down and hold it for more than 2<br />
seconds to begin recording. To stop recording, release the Shutter button.<br />
8
Taking pictures and videos<br />
Camera modes<br />
Use this mode For<br />
9<br />
Auto General picture-taking. Automatically sets exposure, focus,<br />
and flash.<br />
Portrait Full-frame portraits of people. Subject is sharp and the<br />
background is indistinct. Automatically fires a low-level fill<br />
flash. Subject should be at least 2 ft (0.6 m) away and fill<br />
the frame with a head and shoulders pose.<br />
Sport Subjects that are in motion. Shutter speed is fast.<br />
Night Night scenes or low-light conditions. Place the <strong>camera</strong> on a<br />
flat, steady surface or use a tripod. Due to slow shutter<br />
speeds, advise people to stay still for a few seconds after<br />
flash fires.<br />
Landscape Distant subjects. Flash does not fire unless you turn it on.<br />
Auto-focus framing marks (page 11) are not available in<br />
Landscape.<br />
Close-up Close subjects 5.1-27.6 in. (13-70 cm) from the lens in<br />
Wide Angle; 8.7-27.6 in.(22-70 cm) in Telephoto. Use<br />
available light instead of flash if possible. Use the <strong>camera</strong><br />
screen to frame the subject.<br />
Favorites Viewing your favorites. (See Tagging pictures as favorites,<br />
page 36.) Use EasyShare software to load pictures into the<br />
Favorites section of your <strong>camera</strong>’s internal memory.<br />
NOTE: If you press the Review button while in Favorites mode,<br />
you can view the pictures and videos on your card or in<br />
your <strong>camera</strong>’s internal memory. The lens is not extended,<br />
and you cannot take a picture.<br />
Video Capture video with sound. See Taking a video, page 8.
Taking pictures and videos<br />
Using the <strong>camera</strong> screen as a viewfinder<br />
IMPORTANT: The Liveview feature quickly depletes battery power; use it<br />
sparingly.<br />
1 Turn the Mode dial to any Still position.<br />
OK Framing marks<br />
2 Press the OK button to turn on the <strong>camera</strong><br />
screen.<br />
3 Frame your subject in the <strong>camera</strong> screen.<br />
For more about auto-focus framing marks, see<br />
page 11.<br />
4 Press the Shutter button halfway and hold<br />
to set the exposure and focus. When the<br />
framing marks change color, press the rest<br />
of the way down to take the picture.<br />
5 To turn off the <strong>camera</strong> screen, press the OK<br />
button.<br />
To make the <strong>camera</strong> screen turn on whenever the <strong>camera</strong> is on, see Liveview,<br />
page 21.<br />
10
Taking pictures and videos<br />
Using the auto-focus framing marks<br />
When using the <strong>camera</strong> screen as a viewfinder, framing marks indicate where<br />
the <strong>camera</strong> is focusing. For the best possible pictures, the <strong>camera</strong> attempts to<br />
focus on foreground subjects, even if the subjects are not centered in the<br />
scene.<br />
NOTE: This procedure does not apply to videos.<br />
1 Press the OK button to turn on the <strong>camera</strong> screen.<br />
2 Press the Shutter button halfway and hold.<br />
11<br />
When the framing marks turn red, focus is accomplished.<br />
Framing<br />
marks<br />
While the shutter button is pressed halfway:<br />
Center focus<br />
Center wide focus<br />
Side focus<br />
Center and side focus<br />
Left and right focus<br />
3 Press the Shutter button the rest of the way down to take the picture.<br />
4 If the <strong>camera</strong> is not focusing on the desired subject (or if the framing marks<br />
disappear and the Ready light blinks red), release your finger, recompose<br />
the scene, and go to Step 2.<br />
NOTE: Framing marks appear only when the <strong>camera</strong> screen is on.<br />
Framing marks do not appear in Landscape mode.
Taking pictures and videos<br />
Reviewing the picture or video just taken<br />
After you take a picture or video, the <strong>camera</strong> screen displays a Quickview for<br />
approximately 5 seconds. While the picture or video is displayed, you can:<br />
Delete<br />
■ Review: If you take no action, the<br />
picture/video is saved.<br />
■ Play (video): Press the OK button to play the<br />
video. Press to adjust the volume.<br />
■ Share: Press the Share button to tag a<br />
picture/video for email or as a favorite, or to<br />
tag a picture for print. (See page 33.)<br />
■ Delete: Press the Delete button while the<br />
picture/video and are displayed.<br />
OK Share<br />
NOTE: Only the final picture of a burst series (see page 17) is<br />
displayed during Quickview. If you select Delete, all<br />
pictures in the burst series are deleted. To delete<br />
selectively, do so in Review (see page 25).<br />
12
Taking pictures and videos<br />
Using optical <strong>zoom</strong><br />
Use optical <strong>zoom</strong> to get up to 3X closer to your subject. Optical <strong>zoom</strong> is<br />
effective when the lens is no closer than 23.6 in. (60 cm) to the subject or 5.1<br />
in. (13 cm) in Close-up mode. You can change optical <strong>zoom</strong> before (but not<br />
during) video recording.<br />
1 Use the viewfinder or <strong>camera</strong> screen to frame<br />
your subject.<br />
2 Press Telephoto (T) to <strong>zoom</strong> in. Press Wide<br />
Angle (W) to <strong>zoom</strong> out.<br />
If the <strong>camera</strong> screen is turned on, the <strong>zoom</strong><br />
indicator shows when you are in optical or <strong>digital</strong><br />
Zoom indicator<br />
<strong>zoom</strong>.<br />
Digital <strong>zoom</strong><br />
range 3 Press the Shutter button halfway and hold<br />
to set the exposure and focus, then press the<br />
Optical <strong>zoom</strong><br />
range<br />
rest of the way down to take the picture.<br />
(When taking videos, press and release the<br />
Shutter button.)<br />
Using <strong>digital</strong> <strong>zoom</strong><br />
Use <strong>digital</strong> <strong>zoom</strong> in any still mode to get an additional 4X magnification<br />
beyond optical <strong>zoom</strong>. Combined <strong>zoom</strong> settings are from 3.6X to 12X in 0.6X<br />
increments. You must turn on the <strong>camera</strong> screen to activate <strong>digital</strong> <strong>zoom</strong>.<br />
1 Press the OK button to turn on the <strong>camera</strong> screen.<br />
2 Press the Telephoto (T) button to the optical <strong>zoom</strong> limit (3X). Release the<br />
button, then press it again.<br />
The <strong>camera</strong> screen displays the <strong>zoom</strong>ed image and the <strong>zoom</strong> indicator.<br />
3 Press the Shutter button halfway and hold to set the exposure and<br />
focus, then press the rest of the way down to take the picture.<br />
NOTE: You cannot use <strong>digital</strong> <strong>zoom</strong> for video recording.<br />
IMPORTANT: You may notice a decrease in printed image quality when using<br />
<strong>digital</strong> <strong>zoom</strong>. The blue slider on the <strong>zoom</strong> indicator pauses, then<br />
turns red when the picture quality reaches the limit for an<br />
acceptable 4 x 6-inch print.<br />
13
Using the flash<br />
Taking pictures and videos<br />
Use the flash when you take pictures at night, indoors, or outdoors in heavy<br />
shadows. You can change the flash setting in any Still mode; the default flash<br />
setting is restored when you exit the mode or turn off the <strong>camera</strong>.<br />
Turning on the flash<br />
Flash Mode Flash Fires<br />
Auto<br />
Flash<br />
Off Never<br />
Flash Range<br />
Wide Angle 2-11.8 ft (0.6-3.6 m)<br />
Telephoto 2-6.9 ft (0.6-2.1 m)<br />
Press the button to scroll<br />
Flash/status button<br />
through the flash options.<br />
The active flash icon is displayed<br />
in the <strong>camera</strong> screen status area.<br />
When the lighting conditions require it.<br />
Fill Every time you take a picture, regardless of the lighting<br />
conditions. Use when the subject is in shadow or is “backlit”<br />
(when the sun is behind the subject).<br />
Red-eye Once, so the subject’s eyes become accustomed to the flash,<br />
then fires again when the picture is taken. (If the lighting<br />
conditions require flash but do not require Red-eye reduction,<br />
the flash may fire only once.)<br />
14
Taking pictures and videos<br />
Flash settings in each mode<br />
For the best possible pictures, flash settings are preset for each capture mode.<br />
Icon Capture<br />
mode<br />
* When you change to Red-eye in these modes, it remains until you change it.<br />
15<br />
Default<br />
flash<br />
setting<br />
Available flash<br />
settings<br />
(press the Flash button<br />
to change)<br />
Auto Auto* Auto, Flash Off, Fill<br />
Flash, Red-eye<br />
Portrait Fill*<br />
Sport Auto<br />
Night Auto*<br />
Landscape Off<br />
Close-up Off<br />
To return to the<br />
default flash setting:<br />
Exit the mode or turn off<br />
the <strong>camera</strong>.<br />
Video Off None Flash cannot be turned<br />
on.<br />
Burst Off
Putting yourself in the picture<br />
Taking pictures and videos<br />
The Self Timer creates a 10-second delay between the time you press the<br />
Shutter button and the time the picture is taken.<br />
1 Place the <strong>camera</strong> on a flat surface or tripod.<br />
2 In any Still mode, press the Self Timer button .<br />
The Self Timer icon appears in the status area.<br />
3 Compose the scene. Then press the Shutter button halfway and hold to<br />
set the exposure and focus, then press the rest of the way down. Move<br />
so that you are in the scene.<br />
The Self Timer light blinks slowly for 8 seconds (then quickly for 2 seconds)<br />
before the picture is taken. The Self Timer turns off after you take the picture or<br />
if you change modes.<br />
To cancel the Self Timer before the picture is taken, press the Self Timer<br />
button. (The Self Timer setting remains active.)<br />
To turn off the Self Timer, press the Self Timer button twice.<br />
Putting yourself in the video<br />
1 Place the <strong>camera</strong> on a flat surface or tripod.<br />
2 Turn the Mode dial to Video , then press the Self Timer button .<br />
3 Compose the scene, then press the Shutter button completely down. Move<br />
so that you are in the scene.<br />
NOTE: The default video length is Unlimited. The video will stop when you press the Shutter<br />
button or when no storage space remains. To change the video length, see Video Length,<br />
page 21.<br />
16
Taking pictures and videos<br />
Taking a burst series of pictures<br />
Burst lets you to take up to 6 pictures in quick succession (approximately 3<br />
frames per second). Burst is ideal for capturing sporting events or objects in<br />
motion. Flash and Self Timer are disabled when you use Burst.<br />
Turn on burst<br />
17<br />
Burst<br />
Icon<br />
Burst<br />
button<br />
In any Still mode, press the Self Timer/Burst<br />
button twice.<br />
The Burst icon appears in the status area.<br />
NOTE: The setting remains until you change it or turn off the<br />
<strong>camera</strong>.<br />
Take the burst pictures<br />
1 Press the Shutter button halfway and hold to set the auto-focus and<br />
exposure for all the pictures in the sequence.<br />
2 Press the Shutter button the rest of the way down and hold it to take<br />
the pictures.<br />
The <strong>camera</strong> takes up to 6 pictures in quick succession. It stops taking pictures<br />
when you release the Shutter button, when 6 pictures are taken, or when there<br />
is no more storage space.<br />
Exposure, focus, white balance, and orientation are set for the first picture<br />
and applied to all pictures.
Changing picture-taking settings<br />
Taking pictures and videos<br />
You can change settings to get the best results from your <strong>camera</strong>:<br />
1 Press the Menu button. (Some settings are unavailable in some modes.)<br />
2 Press to highlight the setting you wish to change, then press the OK<br />
button.<br />
3 Choose an option, then press the OK button.<br />
4 Press the Menu button to exit.<br />
Setting Icon Options<br />
Exposure Compensation<br />
(still mode)<br />
Choose how much light<br />
enters the <strong>camera</strong>.<br />
This setting remains until<br />
you turn the Mode dial or<br />
turn off the <strong>camera</strong>.<br />
Picture Quality<br />
Choose a picture resolution.<br />
This setting remains until<br />
you change it.<br />
Video Quality<br />
Choose a video resolution.<br />
This setting remains until<br />
you change it.<br />
If pictures are too light, decrease the value.<br />
If pictures are too dark, increase the value.<br />
NOTE: When the <strong>camera</strong> screen is on in any still<br />
capture mode, press then to<br />
adjust exposure compensation. When<br />
satisfied, press again.<br />
Exposure Compensation returns to zero if<br />
Long Time Exposure is set.<br />
Unavailable in Video mode.<br />
Best —4 M pixels; for printing up to<br />
20 x 30 in. (50 x 76 cm).<br />
Best (3:2) —3.5 M pixels; ideal for<br />
printing 4 x 6 in. (10 x 15 cm) prints without<br />
cropping. Also for printing up to 20 x 30 in.<br />
(50 x 76 cm); some cropping may result.<br />
Better —2.1 M pixels; for printing up to<br />
8 x 10 in. (20 x 25 cm).<br />
Good —1.1 M pixels; for emailing,<br />
Internet, screen display, or for conserving<br />
space.<br />
Best —higher resolution and file size.<br />
Video plays in a 640 x 480 pixel window<br />
(VGA).<br />
Good —lower resolution and file size.<br />
Video plays in a 320 x 240 pixel window<br />
(QVGA).<br />
18
Taking pictures and videos<br />
Setting Icon Options<br />
White Balance<br />
Choose your lighting<br />
condition.<br />
This setting remains until<br />
you turn the Mode dial or<br />
turn off the <strong>camera</strong>.<br />
ISO Speed<br />
Control the <strong>camera</strong>’s<br />
sensitivity to light.<br />
This setting remains until<br />
you turn the Mode dial or<br />
turn off the <strong>camera</strong>.<br />
Color Mode<br />
Choose color tones.<br />
This setting remains until<br />
you turn the Mode dial or<br />
turn off the <strong>camera</strong>.<br />
19<br />
Auto (default)—automatically corrects<br />
white balance. Ideal for general picture<br />
taking.<br />
Daylight—for pictures in natural lighting.<br />
Tungsten—corrects the orange cast of<br />
household light bulbs. Ideal for indoor<br />
pictures under tungsten or halogen lighting<br />
without flash.<br />
Fluorescent—corrects the green cast of<br />
fluorescent lighting. Ideal for indoor pictures<br />
under fluorescent lighting without flash.<br />
Unavailable in Video mode.<br />
Choose a lower ISO setting in brightly lit<br />
scenes; use a higher ISO setting for low-light<br />
scenes. Choose Auto (default), 80, 100, 200,<br />
400.<br />
NOTE: ISO returns to Auto when the <strong>camera</strong> is<br />
set to Sport, Night, or Portrait mode, or<br />
during Long Time Exposure.<br />
Unavailable in Video mode.<br />
Color (default)—for color pictures.<br />
Black & White—for black-and-white<br />
pictures.<br />
Sepia—for pictures with a reddish-brown,<br />
antique look.<br />
NOTE: EasyShare software also lets you change a<br />
color picture to black-and-white or sepia.<br />
Unavailable in Video mode.
Setting Icon Options<br />
Exposure Metering<br />
Evaluate light levels at<br />
specific areas of a scene.<br />
This setting remains until<br />
you turn the Mode dial or<br />
turn off the <strong>camera</strong>.<br />
Focus Zone<br />
Select a large or concentrated<br />
area of focus.<br />
This setting remains until<br />
you turn the Mode dial or<br />
turn off the <strong>camera</strong>.<br />
Long Time Exposure<br />
Choose how long the shutter<br />
stays open.<br />
This setting remains until<br />
you turn the Mode dial or<br />
turn off the <strong>camera</strong>.<br />
Image Storage<br />
Choose a storage location for<br />
pictures and videos.<br />
This setting remains until<br />
you change it.<br />
Taking pictures and videos<br />
Multi-pattern (default)—evaluates<br />
lighting conditions throughout the image to<br />
give an optimum picture exposure. Ideal for<br />
general picture taking.<br />
Center-weight—evaluates the lighting<br />
conditions of the subject centered in the<br />
viewfinder. Ideal for backlit subjects.<br />
Center-spot—similar to Center-weight,<br />
except the metering is concentrated on a<br />
smaller area of the subject centered in the<br />
viewfinder. Ideal when you need an exact<br />
exposure of a specific area in the picture.<br />
Unavailable in Video mode.<br />
Multi-zone (default)—evaluates 3 zones<br />
to give an even picture focus. Ideal for<br />
general picture taking.<br />
Center-zone—evaluates the small area<br />
centered in the viewfinder. Ideal when<br />
precise focus of a specific area in the picture<br />
is needed.<br />
NOTE: For the best pictures, the <strong>camera</strong> is set to<br />
Multi-zone when in Landscape mode.<br />
Unavailable in Video mode.<br />
To leave the shutter open longer, increase<br />
the value.<br />
NOTE: When Long Time Exposure is set, Exposure<br />
Compensation is set to zero and ISO is set<br />
to Auto.<br />
Unavailable in Portrait, Sport, Close-up, or<br />
Video mode.<br />
Auto (default)—the <strong>camera</strong> uses the card<br />
if one is in the <strong>camera</strong>. If not, the <strong>camera</strong><br />
uses internal memory.<br />
Internal Memory—the <strong>camera</strong> always<br />
uses internal memory, even if a card is<br />
installed.<br />
20
Taking pictures and videos<br />
Setting Icon Options<br />
Set Album<br />
Choose Album names.<br />
Video Length<br />
Choose video duration.<br />
Setup Menu<br />
Choose additional settings.<br />
Customizing your <strong>camera</strong><br />
Use Setup to customize your <strong>camera</strong> settings.<br />
1 In any mode, press the Menu button.<br />
2 Press to highlight Setup , then press the OK button.<br />
3 Press to highlight the setting you wish to change, then press the OK<br />
button.<br />
4 Choose an option, then press the OK button.<br />
5 Press the Menu button to exit.<br />
Setting<br />
Return to previous menu.<br />
Icon Options<br />
Liveview<br />
Change Liveview default to on or off.<br />
(For more information, see page 10.)<br />
21<br />
On or Off.<br />
Pre-select album names before you take<br />
pictures or videos. Then, all the pictures or<br />
videos you take are tagged with those album<br />
names. See page 23.<br />
Unlimited— (default, as long as there is<br />
room on the card or internal memory, or until<br />
the Shutter button is pressed.)<br />
5, 15, or 30—seconds<br />
See Customizing your <strong>camera</strong>.<br />
On<br />
Off (default)<br />
Camera Sounds All On (default)<br />
Shutter Only<br />
All Off<br />
Date & Time See page 5.
Setting Icon Options<br />
Video Out<br />
Choose the regional setting that lets you<br />
connect the <strong>camera</strong> to a television or<br />
other external device.<br />
Orientation Sensor<br />
Orient pictures so that they are displayed<br />
with the correct side up.<br />
Date Stamp<br />
Imprint the date on pictures.<br />
Video Date Display<br />
Display Date/Time at the start of video<br />
playback.<br />
Taking pictures and videos<br />
NTSC (default)—used in North<br />
America and Japan; most common<br />
format.<br />
PAL—used in Europe and China.<br />
On (default)<br />
Off<br />
Choose a date option, or turn off<br />
the feature. (Default is off.)<br />
Choose a date/time option, or turn<br />
off the feature. (Default is off.)<br />
Language Choose a language.<br />
Format<br />
CAUTION:<br />
Formatting deletes all<br />
pictures and videos,<br />
including those that<br />
are protected.<br />
Removing a card<br />
during formatting may<br />
damage the card.<br />
About<br />
View <strong>camera</strong> information.<br />
Memory Card—deletes<br />
everything on the card; formats the<br />
card.<br />
Cancel—exits without making a<br />
change.<br />
Internal Memory—deletes<br />
everything in internal memory<br />
including email addresses, album<br />
names, and favorites; formats the<br />
internal memory.<br />
22
Taking pictures and videos<br />
Pre-tagging for album names<br />
Use the Set Album (Still or Video) feature to pre-select album names before<br />
you take pictures or videos. Then, all the pictures or videos you take are<br />
tagged with those album names.<br />
First—on your computer<br />
Use <strong>Kodak</strong> EasyShare software (V 3.0 or higher, see page 31) to create album<br />
names on your computer. Then copy up to 32 album names to the album<br />
name list the next time you connect the <strong>camera</strong> to the computer. See <strong>Kodak</strong><br />
EasyShare software Help for details.<br />
Second—on your <strong>camera</strong><br />
1 In any mode, press the Menu button.<br />
2 Press to highlight Set Album , then press the OK button.<br />
3 Press to highlight an album name, then press the OK button. Repeat<br />
to mark pictures or videos for albums.<br />
23<br />
Selected albums are noted with a check mark.<br />
4 To remove a selection, highlight an album name and press the OK button.<br />
To remove all album selections, select Clear All.<br />
5 Highlight Exit, then press the OK button.<br />
Your selections are saved. If you turn on the <strong>camera</strong> screen, your album<br />
selection is displayed on the screen. A plus (+) after the album name means<br />
more than one album is selected.<br />
6 Press the Menu button to exit the menu.<br />
Third—transfer to your computer<br />
When you transfer the tagged pictures or videos to your computer, <strong>Kodak</strong><br />
EasyShare software opens and categorizes your pictures in the appropriate<br />
album. See the <strong>Kodak</strong> EasyShare software Help for details.
3 Reviewing pictures and<br />
videos<br />
Press the Review button to view and work with your pictures and videos. To<br />
save battery power, use the optional <strong>Kodak</strong> EasyShare <strong>camera</strong> or printer dock,<br />
or <strong>Kodak</strong> 3-volt AC adapter. (See www.kodak.com/go/cx7430accessories.)<br />
Viewing single pictures and videos<br />
1 Press the Review button.<br />
2 Press to scroll backward or forward through pictures and videos. (For<br />
fast scrolling, press and hold .)<br />
3 Press the Review button to exit Review.<br />
NOTE: Pictures taken at the Best (3:2) quality setting are displayed at a 3:2 aspect ratio with a<br />
black bar at the top of the screen.<br />
Viewing multiple pictures and videos<br />
1 Press the Review button.<br />
2 Press .<br />
NOTE: You can also press the Menu button, highlight , then press the OK button.<br />
Thumbnails of pictures and videos are displayed.<br />
To display the previous or next row of thumbnails, press .<br />
To scroll through the thumbnails one at a time, press .<br />
To display a single view of the selected picture, press the OK button.<br />
Viewing pictures and videos without extending the lens<br />
1 Turn the mode dial to Favorites .<br />
The lens is not extended, and you cannot take a picture.<br />
2 Press the Review button.<br />
3 See Step 2 under Viewing single pictures and videos.<br />
24
Reviewing pictures and videos<br />
Playing a video<br />
1 Press the Review button.<br />
2 Press to locate a video. (In Multi-up view, highlight a video, then<br />
press the OK button.)<br />
3 To play or pause a video, press the OK button.<br />
NOTE: You can also press the Menu button, highlight , then press the OK button.<br />
To adjust the volume, press .<br />
To rewind the video, press during playback.<br />
To replay the video, press the OK button.<br />
To go to the previous or next picture or video, press .<br />
Deleting pictures and videos<br />
1 Press the Review button.<br />
2 Press to locate a picture or video (or highlight one in multiple view),<br />
then press the Delete button.<br />
3 Press to highlight an option, then press the OK button:<br />
25<br />
PICTURE or VIDEO—deletes the displayed picture or video.<br />
EXIT—exits the Delete screen.<br />
ALL—deletes all pictures and videos from your current storage location.<br />
To delete more pictures and videos, go to Step 2.<br />
NOTE: You cannot delete protected pictures and videos in this manner. Remove protection before<br />
deleting (see page 27).
Changing optional review settings<br />
Reviewing pictures and videos<br />
In Review mode, press the Menu button to access optional review settings.<br />
Magnify picture (page 26) Slide Show (page 28)<br />
Play video (page 25) Copy (page 30)<br />
Album (page 27) Multi-up (page 24)<br />
Protect (page 27) Picture/Video Information (page 30)<br />
Image Storage (page 20) Setup Menu (page 21)<br />
Magnifying pictures<br />
1 Press the Review button, then locate a picture.<br />
2 To magnify at 2X, press the OK button. To magnify at 4X, press the OK<br />
button again. To see different parts of the picture, press . To<br />
redisplay the picture at the 1X (original) size, press the OK button again.<br />
To exit Magnify, press the Menu button.<br />
To exit Review mode, press the Review button.<br />
NOTE: You can also press the Menu button, highlight , then press the OK button.<br />
26
Reviewing pictures and videos<br />
Protecting pictures and videos from deletion<br />
1 Press the Review button, then locate the picture or video.<br />
2 Press the Menu button.<br />
3 Press to highlight Protect , then press the OK button.<br />
27<br />
The picture or video is protected and cannot be deleted. The Protect icon<br />
appears with the protected picture or video.<br />
4 To remove protection, press the OK button again.<br />
5 Press the Menu button to exit the menu.<br />
CAUTION:<br />
Formatting internal memory or an SD/MMC card deletes all<br />
(including protected) pictures, videos. (Formatting internal<br />
memory also deletes email addresses, album names, and<br />
favorites. To restore them, see EasyShare software Help.)<br />
Tagging pictures/videos for albums<br />
Use the Album feature in Review mode to tag the pictures and videos in your<br />
<strong>camera</strong> with album names.<br />
First—on your computer<br />
Use <strong>Kodak</strong> EasyShare software (V 3.0 or higher) to create album names on<br />
your computer, then copy up to 32 album names to the <strong>camera</strong>’s internal<br />
memory. See <strong>Kodak</strong> EasyShare software Help for details.
Second—on your <strong>camera</strong><br />
1 Press the Review button, then locate the picture or video.<br />
2 Press the Menu button.<br />
Reviewing pictures and videos<br />
3 Press to highlight Album , then press the OK button.<br />
4 Press to highlight an album folder, then press the OK button.<br />
To add other pictures to the same album, press to scroll through the<br />
pictures. When the picture you want is displayed, press the OK button.<br />
To add the pictures to more than one album, repeat step 4 for each album.<br />
The album name appears with the picture. A plus (+) after the album name<br />
means the picture was added to more than one album.<br />
To remove a selection, highlight an album name and press the OK button. To<br />
remove all album selections, select Clear All.<br />
Third—transfer to your Computer<br />
When you transfer the tagged pictures and videos to your computer, the<br />
<strong>Kodak</strong> EasyShare software opens and categorizes your pictures and videos in<br />
the appropriate album folder. See <strong>Kodak</strong> EasyShare software Help for details.<br />
Running a slide show<br />
Use the Slide Show to display your pictures and videos on the <strong>camera</strong> screen.<br />
To run a slide show on a television or on any external device, see page 29. To<br />
save battery power, use an optional <strong>Kodak</strong> 3V AC adapter. (Visit<br />
www.kodak.com/go/cx7430accessories.)<br />
Starting the slide show<br />
1 Press the Review button, then press the Menu button.<br />
2 Press to highlight Slide Show , then press the OK button.<br />
3 Press to highlight Begin Show, then press the OK button.<br />
Each picture and video is displayed once, in the order in which you took them.<br />
To interrupt the Slide Show, press the OK button.<br />
28
Reviewing pictures and videos<br />
Changing the slide show display interval<br />
The default interval setting displays each picture for 5 seconds. You can<br />
increase the display interval up to 60 seconds.<br />
1 On the Slide Show menu, press to highlight Interval, then press the<br />
OK button.<br />
2 Select a display interval.<br />
29<br />
To scroll through the seconds quickly, press and hold .<br />
3 Press the OK button.<br />
The interval setting remains until you change it.<br />
Running a continuous slide show loop<br />
When you turn on Loop, the slide show is continuously repeated.<br />
1 On the Slide Show menu, press to highlight Loop, then press the OK<br />
button.<br />
2 Press to highlight On, then press the OK button.<br />
The slide show repeats until you press the OK button or until battery power is<br />
exhausted.<br />
Displaying pictures and videos on a television<br />
You can display pictures and videos on a television, computer monitor, or any<br />
device equipped with a video input. (Image quality on a television screen may<br />
not be as good as on a computer monitor or when printed.)<br />
NOTE: Ensure that the Video Out setting (NTSC or PAL) is correct (see page 22). The slide show<br />
stops if you connect or disconnect the cable while the slide show is running.<br />
1 Connect the audio/video cable (included) from the <strong>camera</strong> video-out port<br />
to the television video-in port (yellow) and audio-in port (white). See your<br />
television user’s guide for details.<br />
2 Review pictures and videos on the television.
Copying pictures and videos<br />
Reviewing pictures and videos<br />
You can copy pictures and videos from a card to internal memory or from<br />
internal memory to a card.<br />
Before you copy, make sure that:<br />
■ A card is inserted in the <strong>camera</strong>.<br />
■ The <strong>camera</strong>’s picture storage location is set to the location from which<br />
you are copying. See Image Storage, page 20.<br />
Copy pictures or videos:<br />
1 Press the Review button, then press the Menu button.<br />
2 Press to highlight Copy , then press the OK button.<br />
3 Press to highlight an option:<br />
PICTURE or VIDEO—copies the current picture or video.<br />
EXIT—returns to the Review menu.<br />
ALL—copies all pictures and videos from your selected storage location to<br />
the other location.<br />
4 Press the OK button.<br />
NOTE:<br />
■ Pictures and videos are copied, not moved. To remove pictures and<br />
videos from the original location after they are copied, delete them<br />
(see page 25).<br />
■ Tags that you applied for print, email, and favorites are not copied.<br />
Protection settings are not copied. To apply protection to a picture or<br />
video, see page 27.<br />
Viewing picture/video information<br />
1 Press the Review button, then press the Menu button.<br />
2 Press to highlight Picture/Video Info, then press the OK button.<br />
3 To view information on the next or previous picture or video, press .<br />
Press the Menu button to exit the menu.<br />
30
31<br />
4 Installing the software<br />
Minimum system requirements<br />
Windows OS-based computers Macintosh computers<br />
■ Windows 98, 98SE, ME, 2000 SP1,<br />
or XP OS<br />
■ Internet Explorer 5.01 or higher<br />
■ 233 MHz processor or greater<br />
■ 64 MB RAM (128 MB RAM for<br />
Windows XP OS)<br />
■ 200 MB hard disk space available<br />
■ CD-ROM drive<br />
■ Available USB port<br />
■ Color monitor, 800 x 600 pixels<br />
(16-bit or 24-bit recommended)<br />
■ Power Mac G3, G4, G5, G4<br />
Cube, iMac; PowerBook G3, G4;<br />
or iBook computers<br />
■ Mac OS X version10.2.3, 10.3<br />
■ Safari 1.0 or higher<br />
■ 128 MB RAM<br />
■ 200 MB hard disk space available<br />
■ CD-ROM drive<br />
■ Available USB port<br />
■ Color monitor, 1024 x 768 pixels<br />
(thousands or millions of colors<br />
recommended)<br />
NOTE: Mac OS 8.6 and 9.x do not support the Share button functions, including Favorites. Mac<br />
OS X version 10.2.x or 10.3 is recommended for full functionality. To download EasyShare<br />
software for Mac OS 8.6 and 9.x, visit www.kodak.com/go/cx7430downloads.
Install the software<br />
Installing the software<br />
CAUTION:<br />
Install <strong>Kodak</strong> EasyShare software<br />
before connecting the <strong>camera</strong> or<br />
optional dock to the computer.<br />
Failure to do so may cause the<br />
software to load incorrectly.<br />
1 Close all software applications that are open on your computer (including<br />
anti-virus software).<br />
2 Place the <strong>Kodak</strong> EasyShare software CD into the CD-ROM drive.<br />
3 Load the software:<br />
Windows OS-based computer—if the install window does not appear,<br />
choose Run from the Start menu and type d:\setup.exe where d is the<br />
drive letter that contains the CD.<br />
Mac OS X—double-click the CD icon on the desktop, then click the Install<br />
icon.<br />
4 Follow the on-screen instructions to install the software.<br />
Windows OS-based computer—select Typical to automatically install the<br />
most commonly used applications. Select Custom to choose the<br />
applications you wish to install.<br />
Mac OS X—follow the on-screen instructions.<br />
NOTE: When prompted, take a few minutes to electronically register your <strong>camera</strong> and software.<br />
This lets you receive information regarding software updates and registers some of the<br />
products included with the <strong>camera</strong>. You must be connected to your Internet service<br />
provider to register electronically. To register later, see<br />
www.kodak.com/go/register.<br />
5 If prompted, restart the computer. If you turned off anti-virus software,<br />
turn it back on. See the anti-virus software manual for details.<br />
For information on the software applications included on the <strong>Kodak</strong> EasyShare<br />
software CD, click the Help button in the <strong>Kodak</strong> EasyShare software.<br />
32
33<br />
5 Sharing pictures and<br />
videos<br />
Press the Share button to<br />
“tag” your pictures and videos.<br />
When they are transferred to your<br />
computer, you can share them by:<br />
Print (page 34) ✔<br />
Favorites (page 36)<br />
for easy organization on your computer and for sharing<br />
on your <strong>camera</strong><br />
✔ ✔<br />
NOTE: Tags remain until removed. If a tagged picture/video is copied, the tag is not copied. In a<br />
burst series, only the last picture is tagged during Quickview.<br />
When can I tag my pictures and videos?<br />
Press the Share button to tag pictures/videos:<br />
■ Any time (The most recent picture/video taken is displayed.)<br />
■ Just after you take a picture/video, during Quickview (see page 12).<br />
■ After pressing the Review button (see page 24).<br />
Pictures Videos<br />
Email (page 35) ✔ ✔
Tagging pictures for printing<br />
1 Press the Share button. Press to locate a picture.<br />
Sharing pictures and videos<br />
2 Press to highlight Print , then press the OK button.*<br />
3 Press to select the number of copies (0-99). Zero removes the tag<br />
for that picture.<br />
The Print icon appears in the status area. The default quantity is one.<br />
4 Optional: You can apply a print quantity to other pictures. Press to<br />
locate a picture. Keep the print quantity as is, or press to change it.<br />
Repeat this step until the desired print quantity is applied to the pictures.<br />
5 Press the OK button. Then press the Share button to exit the menu.<br />
* To tag all pictures in the storage location, highlight Print All, press the OK<br />
button, then indicate the number of copies as described above. Print All is not<br />
available in Quickview.<br />
To remove the print tagging for all pictures in the storage location, highlight<br />
Cancel Prints, then press the OK button. Cancel Prints is not available in<br />
Quickview.<br />
Printing tagged pictures<br />
When you transfer the tagged pictures to your computer, the <strong>Kodak</strong> EasyShare<br />
software print screen opens. For details on printing, click the Help button in<br />
the <strong>Kodak</strong> EasyShare software.<br />
For more information on printing from your computer, printer dock, or card,<br />
see page 39.<br />
NOTE: For the best 4 x 6 in. (10 x 15 cm) prints, set the <strong>camera</strong> to the Best (3:2) print quality<br />
setting. See page 18.<br />
34
Sharing pictures and videos<br />
Tagging pictures and videos for emailing<br />
First—on your computer<br />
Use <strong>Kodak</strong> EasyShare software to create an email address book on your<br />
computer. Then, copy up to 32 email addresses to the <strong>camera</strong>’s internal<br />
memory. For details, click the Help button in the <strong>Kodak</strong> EasyShare software.<br />
Second—tag pictures/videos on your <strong>camera</strong><br />
1 Press the Share button. Press to locate a picture/video.<br />
2 Press to highlight Email , then press the OK button.<br />
35<br />
The Email icon appears in the status area.<br />
3 Press to highlight an email address, then press the OK button.<br />
To tag other pictures/videos with the same address, press to scroll<br />
through them. When the picture you want is displayed, press OK.<br />
To send the pictures/videos to more than one address, repeat step 3 for<br />
each address.<br />
Selected addresses are checked.<br />
4 To remove a selection, highlight a checked address and press the OK<br />
button. To remove all email selections, highlight Clear All.<br />
5 Press to highlight Exit, then press the OK button.<br />
The email icon appears in the status area.<br />
6 Press the Share button to exit the menu.<br />
Third—transfer and email<br />
When you transfer the tagged pictures/videos to your computer, the email<br />
screen opens and lets you send them to the addresses you specified. For<br />
details, click the Help button in the <strong>Kodak</strong> EasyShare software.
Tagging pictures as favorites<br />
Sharing pictures and videos<br />
You can store your favorite pictures in the Favorites section of your<br />
<strong>camera</strong>’s internal memory, then share them with friends and family. Favorites<br />
are loaded into your <strong>camera</strong> after you transfer pictures to your computer. So<br />
you can keep and share more, favorites are smaller than your other pictures.<br />
Share your favorite pictures in 4 easy steps:<br />
1. Take pictures<br />
2. Tag pictures as<br />
favorites<br />
3. Transfer<br />
pictures to your<br />
computer<br />
4. View favorites<br />
on your <strong>camera</strong><br />
1 Press the Share button. Press to locate a picture.<br />
2 Press to highlight Favorite , then press the<br />
OK button.<br />
The Favorite icon appears in the status area. To<br />
remove the tag, press the OK button again.<br />
Press the Share button to exit the menu.<br />
1 If it’s not already installed, install <strong>Kodak</strong> EasyShare<br />
software (v3.3 or higher) on your computer. (See<br />
page 31.)<br />
2 Connect the <strong>camera</strong> to the computer using the USB<br />
cable (see page 38) or an EasyShare dock.<br />
The first time you transfer pictures, a software wizard<br />
helps you make choices about your favorite pictures.<br />
Then, your pictures are transferred to the computer.<br />
Favorite pictures are loaded to the Favorites section of<br />
your <strong>camera</strong>’s internal memory.<br />
1 Turn the Mode dial to Favorites .<br />
2 Press to scroll through favorites.<br />
To exit Favorites mode, turn the Mode dial to any other position.<br />
NOTE: The <strong>camera</strong> holds a limited number of favorites. Use Camera Favorites in the EasyShare<br />
software to customize the size of your <strong>camera</strong> Favorites section. For more<br />
information, click the Help button in the <strong>Kodak</strong> EasyShare software.<br />
36
Sharing pictures and videos<br />
Optional settings<br />
In Favorites mode, press the Menu button to access optional settings.<br />
NOTE: Pictures taken at the Best (3:2) quality setting are displayed at a 3:2 aspect ratio with a<br />
black bar at the top of the screen. (See Picture Quality, page 18.)<br />
Removing all favorites from your <strong>camera</strong><br />
1 Turn the Mode dial to Favorites .<br />
2 Press the Menu button.<br />
3 Highlight , then press the OK button.<br />
37<br />
Magnify (page 26) Picture Information (page 30)<br />
Slide Show (page 28) Remove all favorites (Removing all<br />
favorites from your <strong>camera</strong>, page 37)<br />
Multi-up (page 24) Setup Menu (page 21)<br />
All pictures stored in the Favorites section of internal memory are removed.<br />
Favorites are restored the next time you transfer pictures to the computer.<br />
4 Press the Menu button to exit the menu.<br />
Preventing favorites from transferring to the <strong>camera</strong><br />
1 Open the <strong>Kodak</strong> EasyShare software. Click the My Collection tab.<br />
2 Go to the Albums view.<br />
3 Click the Camera Favorites Album for your <strong>camera</strong>.<br />
4 Click Remove Album.<br />
The next time you transfer pictures from your <strong>camera</strong> to the computer, use the<br />
Camera Favorites Wizard/Assistant to recreate your Camera Favorites Album or<br />
to turn off the Camera Favorites feature.<br />
Printing and emailing favorites<br />
1 Turn the Mode dial to Favorites .Press to locate a picture.<br />
2 Press the Share button.<br />
3 Highlight Print or Email , then press the OK button.<br />
NOTE: Favorites that were taken on this <strong>camera</strong> are good for a 4 x 6-inch<br />
(10 x 15 cm) print.
6 Connecting <strong>camera</strong> to<br />
computer<br />
CAUTION:<br />
Install <strong>Kodak</strong> EasyShare software before connecting the<br />
<strong>camera</strong> or optional dock to the computer. Failure to do so<br />
may cause the software to load incorrectly.<br />
Transferring pictures with the USB cable<br />
1 Turn off the <strong>camera</strong>.<br />
2 Plug the labeled end of the USB cable into<br />
the labeled USB port on your computer. See<br />
your computer user’s guide for details.<br />
3 Plug the other end of the USB cable into the<br />
labeled USB port on the <strong>camera</strong>.<br />
4 Turn on the <strong>camera</strong>.<br />
<strong>Kodak</strong> EasyShare software opens on your<br />
computer. The software prompts you through<br />
the transfer process.<br />
NOTE: Visit www.kodak.com/go/howto for an online tutorial on connecting.<br />
You can also use a <strong>Kodak</strong> multi-card reader or <strong>Kodak</strong> SD multimedia card reader-writer to<br />
transfer your pictures.<br />
38
Connecting <strong>camera</strong> to computer<br />
Printing pictures from your computer<br />
For details on printing pictures from your computer, click the Help button in<br />
the <strong>Kodak</strong> EasyShare software.<br />
Ordering prints online<br />
<strong>Kodak</strong> EasyShare print service (provided by Ofoto www.ofoto.com) is one of<br />
the many online print services offered in the <strong>Kodak</strong> EasyShare software. You<br />
can easily:<br />
■ Upload your pictures.<br />
■ Edit, enhance, and add borders to your pictures.<br />
■ Store pictures, and share them with family and friends.<br />
■ Order high-quality prints, photo greeting cards, frames, and albums—and<br />
have them delivered to your door.<br />
Printing from an optional SD/MMC card<br />
■ Automatically print tagged pictures when you insert your card into a printer<br />
with an SD/MMC slot. See your printer user’s guide for details.<br />
■ Make prints at an SD/MMC-capable <strong>Kodak</strong> picture maker. (Contact a<br />
location prior to visiting. See www.kodak.com/go/picturemaker.)<br />
■ Take the card to your local photo retailer for professional printing.<br />
Printing without a computer<br />
Dock your <strong>camera</strong> to the <strong>Kodak</strong> EasyShare printer dock and print<br />
directly—with or without a computer. Purchase this and other accessories at a<br />
dealer of <strong>Kodak</strong> products or www.kodak.com/go/cx7430accessories.<br />
39
7 Troubleshooting<br />
When you have questions about your <strong>camera</strong>, start here. Additional technical<br />
information is available in the ReadMe file located on the <strong>Kodak</strong> EasyShare<br />
software CD. For updates to Troubleshooting information, see<br />
www.kodak.com/go/cx7430support.<br />
Camera problems<br />
Problem Cause Solution<br />
Camera does<br />
not turn on.<br />
Battery is not<br />
installed correctly or<br />
is exhausted.<br />
Camera does The <strong>camera</strong> has<br />
not turn off; lens locked up.<br />
does not retract.<br />
Pictures<br />
remaining<br />
number does<br />
not decrease<br />
after taking a<br />
picture.<br />
Picture<br />
orientation is<br />
not accurate.<br />
Short battery life<br />
with <strong>Kodak</strong><br />
EasyShare<br />
Ni-MH<br />
rechargeable<br />
battery pack.<br />
Stored pictures<br />
are corrupted.<br />
Recharge the battery or install a new one<br />
(page 2).<br />
Remove the battery, then reinsert or replace<br />
it. If the <strong>camera</strong> still does not function,<br />
contact Customer Support (page 47).<br />
Picture does not take The <strong>camera</strong> is operating normally. Continue<br />
up enough space to taking pictures.<br />
decrease the number.<br />
The <strong>camera</strong> was<br />
rotated or tilted while<br />
the picture was<br />
taken.<br />
Dirt or oxidation on<br />
the battery contacts.<br />
The card was<br />
removed or the<br />
batteries expired<br />
while the ready light<br />
was blinking.<br />
Set the Orientation Sensor (page 22).<br />
Wipe the contacts with a clean, dry cloth<br />
(page 3) before loading batteries in the<br />
<strong>camera</strong>.<br />
Retake picture. Do not remove card while<br />
the ready light is blinking. Keep battery<br />
charged.<br />
40
Troubleshooting<br />
Problem Cause Solution<br />
Shutter button<br />
does not work.<br />
In Review mode,<br />
you do not see a<br />
picture (or the<br />
expected<br />
picture) on the<br />
<strong>camera</strong> screen.<br />
In Review mode,<br />
a black screen is<br />
displayed<br />
instead of a<br />
picture.<br />
Slide show does<br />
not run on<br />
external video<br />
device.<br />
41<br />
Camera is not turned<br />
on.<br />
The <strong>camera</strong> is<br />
processing a picture;<br />
the ready light (near<br />
the viewfinder) is<br />
blinking red.<br />
The card or internal<br />
memory is full.<br />
The Shutter button<br />
was not pressed.<br />
The <strong>camera</strong> may not<br />
be accessing the<br />
correct storage<br />
location.<br />
The file format is<br />
unrecognized.<br />
Video Out setting is<br />
incorrect.<br />
External device is set<br />
incorrectly.<br />
Turn on the <strong>camera</strong><br />
(page 4).<br />
Wait until the ready light stops blinking red<br />
before attempting to take another picture.<br />
You can take a picture even if the ready light<br />
is blinking green.<br />
Transfer pictures to the computer (page 38),<br />
delete pictures from the <strong>camera</strong> (page 25),<br />
switch storage locations (page 20), or insert<br />
a card with available memory (page 7).<br />
For best pictures, see page 8.<br />
Check the picture storage location setting<br />
(page 20).<br />
Transfer the picture to the computer<br />
(page 38).<br />
Adjust the <strong>camera</strong> Video Out setting (NTSC<br />
or PAL, page 22).<br />
See the external device’s user’s guide.
Problem Cause Solution<br />
Picture is too<br />
light.<br />
Picture is not<br />
clear.<br />
The subject was too<br />
close for flash.<br />
The light sensor is<br />
covered.<br />
Troubleshooting<br />
Move so there is at least 2 ft<br />
(0.6 m) between <strong>camera</strong> and subject.<br />
Hold the <strong>camera</strong> so your hands or other<br />
objects do not cover the light sensor (page i).<br />
Too much light. Decrease Exposure Compensation<br />
(page 18).<br />
Auto exposure was<br />
not achieved.<br />
To take the best possible pictures, press the<br />
Shutter button halfway and hold. When<br />
the ready light glows green, press the<br />
Shutter button the rest of the way down<br />
to take the picture.<br />
The lens is dirty. Clean the lens (page 51).<br />
Subject too close<br />
when taking picture.<br />
Subject or the <strong>camera</strong><br />
moved while the<br />
picture was taken.<br />
Auto-focus was not<br />
achieved.<br />
Camera is in Close-up<br />
mode.<br />
Move so there is at least 23.6 in. (60 cm)<br />
between the <strong>camera</strong> and the subject, or at<br />
least 5.1 in. (13 cm) at Wide in Close-up<br />
mode.<br />
Place the <strong>camera</strong> on a flat, steady surface or<br />
use a tripod.<br />
To take the best possible pictures, press the<br />
Shutter button halfway and hold. When<br />
the ready light glows green, press the<br />
Shutter button the rest of the way down<br />
to take the picture. (If the orange light<br />
blinks, release the Shutter button and<br />
recompose picture.)<br />
Use Close-up mode when subject is 5.1-27.6<br />
in. (13-70 cm) from the lens in Wide Angle;<br />
8.7-27.6 in. (22-70 cm) in Telephoto.<br />
42
Troubleshooting<br />
Problem Cause Solution<br />
Picture is too<br />
dark or<br />
underexposed.<br />
The <strong>camera</strong><br />
does not<br />
recognize<br />
SD/MMC card.<br />
Camera freezes<br />
up when a card<br />
is inserted or<br />
removed.<br />
Memory card<br />
full<br />
Camera screen messages<br />
43<br />
Flash is not on, or the<br />
subject was too far<br />
away for the flash to<br />
be effective.<br />
Auto exposure was<br />
not achieved.<br />
Move so there is no more than 11.8 ft (3.6<br />
m) between the <strong>camera</strong> and the subject; 6.9<br />
ft (2.1 m) in Telephoto.<br />
To take the best possible pictures, press the<br />
Shutter button halfway and hold. When<br />
the ready light glows green, press the<br />
Shutter button the rest of the way down<br />
to take the picture.<br />
Not enough light. Increase Exposure Compensation (page 18).<br />
The card may not be<br />
SD/MMC certified.<br />
Purchase a certified SD/MMC card.<br />
The card may be<br />
corrupt.<br />
Card is not properly<br />
inserted in <strong>camera</strong>.<br />
Camera detects an<br />
error when the card is<br />
inserted or removed.<br />
Reformat the card (page 22).<br />
Caution: Formatting deletes all pictures and<br />
videos, including protected files.<br />
Insert a card into the slot, then push to seat<br />
(page 7).<br />
Turn the <strong>camera</strong> off, then back on.<br />
Make sure the <strong>camera</strong> is off when inserting<br />
or removing a card.<br />
Storage is full. Insert a new card (page 7), transfer pictures<br />
(page 38), or delete pictures (page 25).<br />
The maximum<br />
number of files or<br />
folders is reached (or<br />
other directory<br />
concern).<br />
Transfer pictures and videos to the<br />
computer, then format the card or internal<br />
memory (page 22).<br />
Caution: Formatting a card deletes all<br />
pictures and videos, including protected<br />
files.<br />
Message Cause Solution<br />
No images to display There are no pictures<br />
in the current storage<br />
location.<br />
Change picture storage location<br />
setting (page 20).
Message Cause Solution<br />
Memory card requires<br />
formatting<br />
Memory card cannot be<br />
read (Please format memory<br />
card or insert another<br />
memory card)<br />
Remove USB cable in<br />
<strong>camera</strong><br />
Restart computer if needed<br />
Internal memory requires<br />
formatting<br />
Internal memory cannot be<br />
read (Please format internal<br />
memory)<br />
No memory card (Files not<br />
copied)<br />
Not enough space to copy<br />
files (Files not copied)<br />
Memory card is locked<br />
(Insert a new memory card)<br />
Memory card is unusable<br />
(Insert a new memory card)<br />
Memory card speed is slow.<br />
Record video in internal<br />
memory or change card.<br />
The card is corrupted<br />
or formatted for<br />
another <strong>digital</strong><br />
<strong>camera</strong>.<br />
USB cable is<br />
connected to <strong>camera</strong>.<br />
The <strong>camera</strong> internal<br />
memory is corrupted.<br />
There is no card in the<br />
<strong>camera</strong>. Pictures were<br />
not copied.<br />
There is not enough<br />
space in the location<br />
you are copying to<br />
(internal memory or<br />
the card).<br />
The card is<br />
write-protected.<br />
The card is slow,<br />
corrupted, or<br />
unreadable.<br />
This card cannot be<br />
used to take videos.<br />
Troubleshooting<br />
Insert a new card or format the<br />
card (page 22).<br />
Caution: Formatting deletes all<br />
pictures and videos, including<br />
protected files.<br />
Unplug the USB cable from the<br />
<strong>camera</strong>.<br />
Format the internal memory<br />
(page 22).<br />
Caution: Formatting deletes all<br />
pictures and videos, including<br />
protected files. (Formatting<br />
internal memory also deletes<br />
email addresses, album names,<br />
and favorites. To restore them,<br />
see <strong>Kodak</strong> EasyShare software<br />
Help.)<br />
Insert a card (page 7).<br />
Delete pictures from the<br />
location you are copying to<br />
(page 25), or insert a new card.<br />
To take a picture, insert a new<br />
card or change storage location<br />
to internal memory (page 20).<br />
Insert a new card or format the<br />
card (page 22).<br />
Change storage location to<br />
internal memory (page 20). Use<br />
this card to take pictures only.<br />
44
Troubleshooting<br />
Message Cause Solution<br />
Reset the clock (page 5).<br />
Date and time have been<br />
reset<br />
No address book on <strong>camera</strong><br />
(Connect with computer to<br />
import address book)<br />
No album names on <strong>camera</strong><br />
(Connect with computer to<br />
import album names)<br />
High <strong>camera</strong> temperature<br />
(Camera will be turned off)<br />
45<br />
This is the first time<br />
you turned on the<br />
<strong>camera</strong>; or you<br />
removed the batteries<br />
for an extended time;<br />
or the batteries are<br />
exhausted.<br />
No email addresses<br />
appear because there<br />
is no address book.<br />
Album names have not<br />
been copied to the<br />
<strong>camera</strong> from the<br />
computer.<br />
The internal<br />
temperature of the<br />
<strong>camera</strong> is too high for<br />
the <strong>camera</strong> to operate.<br />
The viewfinder light<br />
glows red and the<br />
<strong>camera</strong> turns off.<br />
Unrecognized file format The <strong>camera</strong> cannot<br />
read the picture<br />
format.<br />
No images in Favorites.<br />
Press “review” for current<br />
images.<br />
Camera error #<br />
See user’s guide<br />
There are no Favorites<br />
in the <strong>camera</strong>’s<br />
internal memory.<br />
Create and copy address book<br />
from computer. See EasyShare<br />
software Help.<br />
Create and copy album names<br />
from computer. See EasyShare<br />
software Help.<br />
Leave the <strong>camera</strong> off until it’s<br />
cool to the touch, then turn it<br />
back on.<br />
If the message reappears,<br />
contact Customer Support<br />
(page 47).<br />
Transfer the unreadable picture<br />
to the computer (page 38), or<br />
delete it (page 25).<br />
See Tagging pictures as<br />
favorites, page 36.<br />
An error is detected. Turn the <strong>camera</strong> off, then back<br />
on. If error reappears, write<br />
down the number and contact<br />
Customer Support (page 47).
Camera ready light status<br />
Status Cause Solution<br />
Ready light does not turn<br />
on and the <strong>camera</strong> does<br />
not work.<br />
Mode dial was on when<br />
batteries were reloaded.<br />
Ready light blinks green. Picture is being<br />
processed and saved to<br />
the <strong>camera</strong>.<br />
Ready light blinks<br />
orange.<br />
Ready light blinks red and<br />
<strong>camera</strong> turns off.<br />
Ready light glows steady<br />
red.<br />
Ready light glows steady<br />
green<br />
Ready light glows steady<br />
orange<br />
Troubleshooting<br />
Camera is not turned on. Turn on the <strong>camera</strong><br />
(page 4).<br />
Battery is exhausted. Recharge the battery or install a<br />
new one (page 2).<br />
Turn Mode dial off, then back<br />
on.<br />
Camera is operating normally.<br />
Flash is not charged. Wait. Resume picture taking<br />
when the light stops blinking<br />
and turns off.<br />
Auto exposure or<br />
auto-focus are not<br />
locked.<br />
Battery is low or<br />
exhausted.<br />
Camera’s internal<br />
memory or card is full.<br />
Camera processing<br />
memory is full.<br />
Release the Shutter button and<br />
recompose the picture.<br />
Recharge the battery or install a<br />
new one (page 2).<br />
Transfer pictures to the<br />
computer (page 38), delete<br />
pictures from the <strong>camera</strong><br />
(page 25), switch storage<br />
locations (page 20), or insert a<br />
card with available memory<br />
(page 7).<br />
Wait. Resume picture taking<br />
when the light turns off.<br />
Card is read-only. Change storage location to<br />
internal memory (page 20), or<br />
use a different card.<br />
Shutter button is pressed Camera is operating normally.<br />
halfway down. Focus and<br />
exposure are set.<br />
The Mode dial is set to Camera is operating normally.<br />
Favorites.<br />
46
47<br />
8 Getting help<br />
Helpful links<br />
Help with your <strong>camera</strong> www.kodak.com/go/cx7430support<br />
Help with Windows operating system<br />
and working with <strong>digital</strong> pictures<br />
www.kodak.com/go/pcbasics<br />
Download the latest <strong>camera</strong> software<br />
and firmware<br />
www.kodak.com/go/cx7430downloads<br />
Optimize your printer for truer, more<br />
vibrant colors<br />
www.kodak.com/go/onetouch<br />
Get support for <strong>camera</strong>s, software,<br />
accessories, more<br />
www.kodak.com/go/support<br />
Purchase <strong>camera</strong> accessories www.kodak.com/go/cx7430accessories<br />
Register your <strong>camera</strong> www.kodak.com/go/register<br />
View online tutorials www.kodak.com/go/howto<br />
Software help<br />
Click the Help button in the <strong>Kodak</strong> EasyShare software.<br />
Telephone customer support<br />
If you have questions concerning the operation of the software or <strong>camera</strong>, you<br />
may speak with a customer support representative.<br />
Before you call<br />
Have the <strong>camera</strong>, <strong>camera</strong> dock, or printer dock connected to your computer.<br />
Be at your computer, and have the following information available:<br />
■ Computer model<br />
■ Amount of free hard disk space<br />
■ Operating system<br />
■ Camera serial number<br />
■ Processor type and speed (MHz) ■ Version of <strong>Kodak</strong> EasyShare software<br />
■ Amount of memory (MB) ■ Exact error message you received
Getting help<br />
Australia 1800 147 701 Netherlands 020 346 9372<br />
Austria 0179 567 357 New Zealand 0800 440 786<br />
Belgium 02 713 14 45 Norway 23 16 21 33<br />
Brazil 0800 150000 Philippines 1 800 1 888 9600<br />
Canada 1 800 465 6325 Portugal 021 415 4125<br />
China 800 820 6027 Singapore 800 6363 036<br />
Denmark 3 848 71 30 Spain 91 749 76 53<br />
Ireland 01 407 3054 Sweden 08 587 704 21<br />
Finland 0800 1 17056 Switzerland 01 838 53 51<br />
France 01 55 1740 77 Taiwan 0800 096 868<br />
Germany 069 5007 0035 Thailand 001 800 631 0017<br />
Greece 00800 441 25605 UK 0870 243 0270<br />
Hong Kong 800 901 514 United States 1 800 235 6325<br />
India 91 22 617 5823 Outside the United<br />
States<br />
585 726 7260<br />
Italy 02 696 33452 International Toll<br />
Line<br />
+44 131 458 6714<br />
Japan 03 5644 5050 International Toll<br />
Fax<br />
+44 131 458 6962<br />
Korea 00798 631 0024<br />
For the most up-to-date listings, visit:<br />
http://www.kodak.com/US/en/<strong>digital</strong>/contacts/DAIInternationalContacts.shtml<br />
48
49<br />
9 Appendix<br />
Camera specifications<br />
For more specifications, visit www.kodak.com/go/cx7430support.<br />
<strong>Kodak</strong> EasyShare <strong>CX7430</strong> <strong>zoom</strong> <strong>digital</strong> <strong>camera</strong><br />
Color 24-bit, millions of colors<br />
Color modes Color, black & white, sepia<br />
Communication with computer USB 2.0, via USB cable, EasyShare <strong>camera</strong> dock, or<br />
printer dock<br />
Dimensions Width<br />
Depth<br />
Height<br />
4.0 in. (102.5 mm)<br />
1.5 in. (38 mm)<br />
2.6 in. (65 mm)<br />
Weight 6.3 oz (178 g) without batteries or card<br />
Exposure Control Exposure compensation: +/- 2 EV in 0.5 increments<br />
Exposure Metering TTL-AE Multi-pattern, Center-spot,<br />
Center-weighted<br />
File format Still JPEG/EXIF v2.21<br />
Video QuickTime (CODEC: MPEG-4)<br />
Audio G.711<br />
Flash Modes Auto, Fill, Red-eye, Off<br />
Range Wide: 2-11.8 ft (0.6-3.6 m) at ISO 140<br />
Tele: 2-6.9 ft (0.6-2.1 m) at ISO 140<br />
Charging Time 7 seconds with charged battery<br />
Image sensor 1/2.5 in. interline transfer CCD, 4:3 aspect ratio, RGB Bayer CFA,<br />
4.23 M pixels<br />
ISO speed Automatic 80-160<br />
Selectable 80, 100, 200, 400
<strong>Kodak</strong> EasyShare <strong>CX7430</strong> <strong>zoom</strong> <strong>digital</strong> <strong>camera</strong><br />
Appendix<br />
Lens Type Optical quality glass, 6 groups/7 elements (2<br />
aspherical lenses)<br />
Aperture Wide: f/2.7-f/5.2; Tele: f/4.6-f/8.7<br />
Focal Length 34 - 102 mm (35 mm equivalent)<br />
Focus Distance Wide: 23.6 in. (0.6 m) to infinity; 32.8 ft (10 m) to<br />
infinity in Landscape<br />
Close-up: 5.1-27.6 in. (13-70 cm)<br />
Focus Zones Multi-zone or Center-Zone<br />
Liquid Crystal Display, LCD<br />
(Camera screen)<br />
1.6 in. (4 cm), color, 312 x 230 (72 K) pixels.<br />
Preview rate: 29.8 fps<br />
Operating Temperature 32 to 104° F (0 to 40° C)<br />
Picture/Video storage 16 MB internal; optional MMC or SD Card<br />
(The SD logo is a trademark of the SD Card<br />
Association.)<br />
Picture<br />
resolution<br />
Best<br />
Best (3:2)<br />
Better<br />
Good<br />
2304 x 1728 (4 M) pixels<br />
2304 x 1536 (3.5 M) pixels<br />
1656 x 1242 (2.1 M) pixels<br />
1200 x 900 (1.1 M) pixels<br />
Power Batteries 2-AA <strong>Kodak</strong> <strong>digital</strong> <strong>camera</strong> batteries, 2-AA lithium,<br />
2-AA Ni-MH, CRV3, KODAK KAA2HR Ni-MH<br />
rechargeable battery pack<br />
AC adapter 3V DC (purchase separately)<br />
Self Timer 10 seconds<br />
Shutter Speed Automatic: 1/2 to 1/1400 second<br />
Selectable: 0.7 to 4 seconds<br />
Tripod socket 1/4 in. standard<br />
Video Out format NTSC or PAL selectable<br />
Video resolution Best<br />
Good<br />
Viewfinder Real-image, optical<br />
Best: 640 x 480 pixels (VGA), 13 fps<br />
Good: 320 x 240 pixels (QVGA), 20 fps<br />
White balance Auto, Daylight, Tungsten, Fluorescent<br />
Zoom (still capture) 3X optical, 4X <strong>digital</strong><br />
50
Appendix<br />
Tips, safety, maintenance<br />
■ If the <strong>camera</strong> has been subjected to inclement weather or you suspect<br />
water has gotten inside the <strong>camera</strong>, turn off the <strong>camera</strong> and remove the<br />
batteries and card. Allow all components to air-dry for at least 24 hours<br />
before using the <strong>camera</strong> again.<br />
■ Blow gently on the lens or <strong>camera</strong> screen to remove dust and dirt. Wipe<br />
gently with a soft, lint-free cloth or an untreated lens-cleaning tissue. Do<br />
not use cleaning solutions unless designed specifically for <strong>camera</strong> lenses.<br />
Do not allow chemicals, such as suntan lotion, to contact painted surfaces.<br />
■ Service agreements are available in some countries. Contact a dealer of<br />
<strong>Kodak</strong> products for more information.<br />
■ For rechargeable battery disposal information, visit the Rechargeable<br />
Battery Recycling Corporation Web site at www.rbrc.com.<br />
■ For <strong>digital</strong> <strong>camera</strong> disposal or recycling information, contact your local<br />
authorities. In the US, visit the Electronics Industry Alliance Web site at<br />
www.eiae.org or the <strong>Kodak</strong> Web site at<br />
www.kodak.com/go/cx7430support.<br />
Storage capacities<br />
File sizes can vary. You may be able to store more or fewer pictures and<br />
videos. Favorites take up additional space in internal memory.<br />
Picture storage capacity<br />
51<br />
Number of pictures<br />
Best Best (3:2) Better Good<br />
16 MB internal memory 10 11 17 30<br />
16 MB SD/MMC 12 13 21 36<br />
32 MB SD/MMC 24 27 43 73<br />
64 MB SD/MMC 49 54 87 147<br />
128 MB SD/MMC 98 109 175 294<br />
256 MB SD/MMC 196 218 351 588
Video storage capacity<br />
Minutes/seconds of video<br />
Best Good<br />
16 MB internal memory 1 min. 2 min.<br />
16 MB SD/MMC 1 min. 5 sec. 2 min. 15 sec.<br />
32 MB SD/MMC 2 min. 15 sec. 4 min. 30 sec.<br />
64 MB SD/MMC 4 min. 30 sec. 9 min.<br />
128 MB SD/MMC 9 min. 18 min.<br />
256 MB SD/MMC 18 min. 36 min.<br />
Power-saving features<br />
Upgrading your software and firmware<br />
Appendix<br />
If no action for The <strong>camera</strong> To turn it back on<br />
1 minute Screen turns off. Press the OK button.<br />
8 minutes Enters auto power off. Press a button or insert/remove card.<br />
3 hours Turns off. Turn Mode dial Off, then back on.<br />
Download the latest versions of the software included on the <strong>Kodak</strong><br />
EasyShare software CD and the <strong>camera</strong> firmware (the software that runs on<br />
the <strong>camera</strong>). See www.kodak.com/go/cx7430downloads.<br />
52
Appendix<br />
Regulatory compliance<br />
FCC compliance and advisory<br />
This equipment has been tested and found to comply with the limits for a<br />
Class B <strong>digital</strong> device, pursuant to Part 15 of the FCC Rules. These limits are<br />
designed to provide reasonable protection against harmful interference in a<br />
residential installation.<br />
This equipment generates, uses, and can radiate radio frequency energy and,<br />
if not installed or used in accordance with the instructions, may cause harmful<br />
interference to radio communications. However, there is no guarantee that<br />
interference will not occur in a particular installation.<br />
If this equipment does cause harmful interference to radio or television<br />
reception, which can be determined by turning the equipment off and on, the<br />
user is encouraged to try to correct the interference by one or more of the<br />
following measures: 1) reorient or relocate the receiving antenna; 2) increase<br />
the separation between the equipment and the receiver; 3) connect the<br />
equipment to an outlet on a circuit different from that to which the receiver is<br />
connected; 4) consult the dealer or an experienced radio/TV technician for<br />
additional suggestions.<br />
Any changes or modifications not expressly approved by the party responsible<br />
for compliance could void the user’s authority to operate the equipment.<br />
Where shielded interface cables have been provided with the product or<br />
specified additional components or accessories elsewhere defined to be used<br />
with the installation of the product, they must be used in order to ensure<br />
compliance with FCC regulation.<br />
Canadian DOC statement<br />
DOC Class B Compliance—This Class B <strong>digital</strong> apparatus complies with<br />
Canadian ICES-003.<br />
Observation des normes-Class B—Cet appareil numérique de la classe B<br />
est conforme à la norme NMB-003 du Canada.<br />
53<br />
<strong>Kodak</strong> EasyShare <strong>CX7430</strong> <strong>zoom</strong> <strong>digital</strong> <strong>camera</strong><br />
Tested to comply with FCC Standards.<br />
FOR HOME OR OFFICE USE
VCCI Class B ITE<br />
English translation:<br />
Appendix<br />
This is a Class B product based on the standard of the Voluntary Control<br />
Council for Interference from Information Technology Equipment (VCCI). If this<br />
is used near a radio or television receiver in a domestic environment, it may<br />
cause radio interference. Install and use the equipment according to the<br />
instruction manual.<br />
MPEG-4<br />
Use of this product in any manner that complies with the MPEG-4 visual<br />
standard is prohibited, except for use by a consumer engaging in personal and<br />
non-commercial activities.<br />
54
Index 1<br />
Numerics<br />
4-way controller, ii<br />
A<br />
A/V out, i, 29<br />
AA battery, installing, 2<br />
about picture, video, 30<br />
about this <strong>camera</strong>, 22<br />
AC adapter, 4<br />
accessories<br />
AC adapter, 4<br />
battery, 3<br />
buying, 47<br />
<strong>camera</strong> dock, 4<br />
printer dock, 4, 39<br />
SD/MMC card, 7<br />
album, 21<br />
albums, tagging pictures for, 23, 27<br />
alkaline batteries, warning, 2<br />
auto, 9<br />
flash, 14<br />
focus framing marks, 11<br />
power-down, 52<br />
B<br />
batteries<br />
expected life, 3<br />
extending life, 3<br />
loading, 2<br />
safety and handling, 4<br />
types, 3<br />
battery door location, iii<br />
burst, ii, 17<br />
button<br />
delete, ii, 12<br />
flash/status, 14<br />
menu, ii<br />
OK, 5<br />
on/off, ii<br />
review, ii, 24<br />
55<br />
self timer/burst, iii, 17<br />
share, ii, 33<br />
shutter, i, iii<br />
<strong>zoom</strong>, ii, 13<br />
C<br />
cable<br />
audio/video, 1, 29<br />
USB, 1, 38<br />
<strong>camera</strong> dock, 4<br />
<strong>camera</strong> dock connector on<br />
<strong>camera</strong>, iii<br />
<strong>camera</strong> screen<br />
reviewing pictures, 24<br />
reviewing videos, 24<br />
using as viewfinder, 10<br />
<strong>camera</strong> sounds, 21<br />
Canadian compliance, 53<br />
caring for your <strong>camera</strong>, 51<br />
clock, setting, 5<br />
close-up, 9<br />
color mode, 19<br />
computer<br />
connecting <strong>camera</strong>, 38<br />
transfer to, 38<br />
connector for <strong>camera</strong> dock, iii<br />
contents, <strong>camera</strong> box, 1<br />
copy pictures<br />
card to memory, 30<br />
memory to card, 30<br />
to computer via USB cable, 38<br />
CRV3 battery<br />
expected life, 3<br />
loading, 2<br />
customer support, 47<br />
customizing <strong>camera</strong> settings, 21<br />
D<br />
date & time, 21<br />
date setting, 5
date stamp, 22<br />
DC-in, ii<br />
delete button, ii<br />
deleting<br />
during quickview, 12<br />
from internal memory, 25<br />
from SD/MMC card, 25<br />
protecting pictures, videos, 27<br />
<strong>digital</strong> <strong>zoom</strong>, using, 13<br />
displaying slide show, 28<br />
disposal, recycling, 51<br />
dock<br />
<strong>camera</strong>, 4<br />
printer, 4, 39<br />
downloading pictures, 38<br />
E<br />
EasyShare software, 31<br />
emailing pictures, videos, 35<br />
error code, 45<br />
exposure compensation, 18<br />
exposure metering, 20<br />
external video device<br />
viewing pictures, videos, 29<br />
F<br />
favorites, 9<br />
removing, 37<br />
settings, 37<br />
tagging, 36<br />
FCC compliance, 53<br />
firmware, upgrading, 52<br />
flash<br />
settings, 14<br />
unit, i<br />
focus framing marks, 11<br />
focus zone, 20<br />
format, 22<br />
G<br />
guidelines, battery, 3<br />
H<br />
help<br />
software, 47<br />
support, 47<br />
web links, 47<br />
I<br />
icons, mode dial, 9<br />
image storage, 20<br />
information<br />
about pictures, videos, 30<br />
installing<br />
batteries, 2<br />
SD/MMC card, 7<br />
software, 32<br />
internal memory<br />
storage capacity, 51<br />
ISO speed, 19<br />
Index<br />
K<br />
<strong>Kodak</strong> <strong>digital</strong> <strong>camera</strong> batteries, 2<br />
<strong>Kodak</strong> EasyShare software<br />
getting help, 47<br />
installing, 32<br />
upgrading, 52<br />
<strong>Kodak</strong> web sites, 47<br />
L<br />
landscape, 9<br />
language, 22<br />
LCD (liquid crystal display). See <strong>camera</strong><br />
screen<br />
lens, i<br />
light<br />
ready, ii<br />
self timer, 16<br />
sensor, i<br />
lithium batteries, expected life, 3<br />
liveview, 21<br />
<strong>camera</strong> screen as viewfinder, 10<br />
loading<br />
batteries, 2<br />
56
Index<br />
SD/MMC card, 7<br />
software, 32<br />
long time exposure, 20<br />
M<br />
Macintosh<br />
installing software on, 32<br />
magnify picture, 26<br />
maintenance, <strong>camera</strong>, 51<br />
memory<br />
inserting card, 7<br />
storage capacities, 51<br />
menu<br />
button, ii<br />
menu button, ii<br />
microphone, i<br />
mode dial, ii, 9<br />
modes<br />
auto, 9<br />
close-up, 9<br />
favorites, 9<br />
landscape, 9<br />
night, 9<br />
portrait, 9<br />
N<br />
night, 9<br />
Ni-MH rechargeable battery<br />
expected life, 3<br />
O<br />
OK button, 5<br />
online prints, ordering, 39<br />
optical <strong>zoom</strong>, 13<br />
orientation sensor, 22<br />
overview<br />
<strong>camera</strong>, ii<br />
<strong>camera</strong> modes, 9<br />
P<br />
package contents, <strong>camera</strong>, 1<br />
picture quality, 18<br />
57<br />
pictures<br />
checking settings, 6, 7<br />
copying, 30<br />
deleting, 25<br />
emailing tagged, 35<br />
magnifying, 26<br />
printing, 39<br />
printing tagged, 34<br />
protecting, 27<br />
reviewing, 24<br />
storage capacity, 51<br />
tagging, 23, 27<br />
taking, modes, 9<br />
transfer via USB cable, 38<br />
portrait, 9<br />
power<br />
auto off, 52<br />
<strong>camera</strong>, 4<br />
switch, ii<br />
printer dock, 4, 39<br />
printing<br />
from a card, 39<br />
optimizing printer, 47<br />
order online, 39<br />
pictures, 39<br />
tagged pictures, 39<br />
without computer, 39<br />
product overview, ii<br />
protecting pictures, videos, 27<br />
Q<br />
quickview<br />
using, 12<br />
R<br />
ReadMe file, 40<br />
ready light, ii<br />
recycling, disposal, 51<br />
red-eye, flash, 14<br />
regulatory information, 53<br />
removing favorites, 37<br />
review button, ii, 24
eviewing pictures<br />
as you take them, 12<br />
<strong>camera</strong> screen, 24<br />
deleting, 25<br />
magnifying, 26<br />
protecting, 27<br />
slide show, 28<br />
reviewing videos<br />
<strong>camera</strong> screen, 24<br />
deleting, 25<br />
protecting, 27<br />
slide show, 28<br />
running slide show, 28<br />
S<br />
safety, 51<br />
SD/MMC card<br />
inserting, 7<br />
printing from, 39<br />
slot location, i<br />
storage capacities, 51<br />
SD/MMC card, inserting, 7<br />
self timer<br />
button, ii<br />
light, i<br />
with pictures, 16<br />
with videos, 16<br />
sensor, light, i<br />
service and support<br />
telephone numbers, 47<br />
setting<br />
album, 21<br />
<strong>camera</strong> sounds, 21<br />
color mode, 19<br />
date & time, 21<br />
date and time, 5<br />
date stamp, 22<br />
exposure compensation, 18<br />
exposure metering, 20<br />
flash, 14<br />
focus zone, 20<br />
image storage, 20<br />
ISO speed, 19<br />
language, 22<br />
liveview, 21<br />
long time exposure, 20<br />
orientation sensor, 22<br />
picture quality, 18<br />
picture taking mode, 9<br />
self timer, 16<br />
video date display, 22<br />
video length, 21<br />
video out, 22<br />
video quality, 18<br />
white balance, 19<br />
setup mode, using, 21<br />
share button, ii, 33<br />
shutoff, auto, 52<br />
shutter<br />
problems, 41<br />
self timer delay, 16<br />
sleep mode, 52<br />
slide show<br />
continuous loop, 29<br />
problems, 41<br />
running, 28<br />
software<br />
getting help, 47<br />
installing, 32<br />
upgrading, 52<br />
specifications, <strong>camera</strong>, 49<br />
storage capacity, 51<br />
support, technical, 47<br />
T<br />
tagging<br />
favorites, 36<br />
for email, 35<br />
for print, 34<br />
when to tag, 33<br />
tagging pictures<br />
for albums, 23, 27<br />
Index<br />
58
Index<br />
telephone support, 47<br />
telephoto button, ii<br />
television, slide show, 29<br />
time, setting, 5<br />
timer, shutter delay, 16<br />
tips<br />
battery guidelines, 3<br />
<strong>camera</strong> maintenance, 51<br />
ReadMe file, 40<br />
safety, 51<br />
transfer, via USB cable, 38<br />
trash can, deleting, 12<br />
turning <strong>camera</strong> on and off, 4<br />
U<br />
upgrading software, firmware, 52<br />
URLs, <strong>Kodak</strong> web sites, 47<br />
USB (universal serial bus)<br />
connection location, i<br />
transferring pictures, 38<br />
V<br />
VCCI compliance, 54<br />
video date display, 22<br />
video length, 21<br />
video out, 22<br />
video quality, 18<br />
videos<br />
checking settings, 6, 7<br />
copying, 30<br />
deleting, 25<br />
emailing tagged, 35<br />
protecting, 27<br />
reviewing, 24<br />
storage capacities, 51<br />
transfer to computer, 38<br />
viewing, 24<br />
viewfinder, i, ii<br />
using <strong>camera</strong> screen, 10<br />
viewing picture<br />
after taking, 12, 24<br />
magnified, 26<br />
59<br />
viewing picture, video<br />
information, 30<br />
W<br />
white balance, 19<br />
wide angle button, ii<br />
Windows computers<br />
installing software, 32<br />
wrist strap post, i<br />
Z<br />
<strong>zoom</strong><br />
button, ii<br />
<strong>digital</strong>, 13<br />
optical, 13