
Related Manuals for Rollei RCP-8325XS


Summary of Contents for Rollei RCP-8325XS
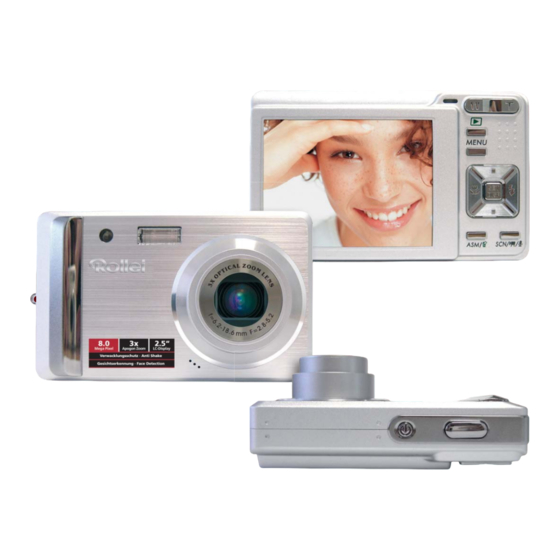
- Page 1 • USER GUIDE • BEDIENUNGSANLEITUNG • MANUALE DELL‘UTENTE RCP-8325XS 8 MEGA PIXELS | ROLLEI 3 x APOGON ZOOM | 2.5“ COLOUR-LCD | USB 2.0 HIGH SPEED | SDHC 4 GB SUPPORT | 18.9 MM FLAT...
-
Page 2: Fcc Compliance And Advisory
Precautions Before using the camera, please ensure that you read and understand the safety precautions described below. Always ensure that the camera is operated correctly. Do not aim the camera directly into the sun or other intense light sources which could damage your eyesight. -
Page 3: Table Of Contents
Contents PRECAUTIONS SING THE MODE ETTING MAGE IZE AND UALITY CONTENTS SING THE UNCTION SING THE LASH GETTING STARTED SING THE ACRO & B SING THE TIMER URST SING THE PERTURE RIORITY SING NPACKING SING THE HUTTER RIORITY ARTS OF THE AMERA SING THE ANUAL... - Page 4 ELETING ILES ELETING A INGLE ELETING ULTIPLE ILES ELETING ILES ROTECTING A INGLE ROTECTING ILES ROTECTING ULTIPLE ILES DITING MAGES OTATING TILL MAGES HANGING THE MAGE HANGING THE MAGE WITH FFECTS HOOSING THE MAGE WITH HOTO RAME OPYING THE ILES DPOF ETTING THE HOOSING A...
-
Page 5: Using This Menu
Getting Started Using This Menu Getting Started This section contains information you should know before using this camera. Basic Operation This section explains all recording features of this camera. Basic Recording This section explains how to record still images, movies, and audio files. Other Recording Functions This section explains common operations about recording images. - Page 6 Unpacking Camera USB Cable AV Cable Rechargeable Lithium-ion Soft Case(*) Strap Battery Software Installation Battery Charger & Quick Start Guide CD-ROM Adaptor Actual accessories may be different. Items marked with (*) are available as optional accessories. The shape of the AC power cord plug depends on the country of use. Do not swing the camera around by the strap.
-
Page 7: Parts Of The Camera
Parts of the Camera 1. Self-timer Lamp / AF Lamp 2. Flash ( page 23) 3. Lens 4. Microphone 5. LCD Monitor ( page 9) 6. Operation Lamp 7. Zoom Button ( page 22) See also: Thumbnail ( page 37) Playback Zoom ( page 36) 8. - Page 8 15. Strap Ring 16. Shutter Button ( page 19, 17. Power Button ( page 12) 18. USB/AV Terminal ( page 18, 19. Speaker 20. Tripod Socket 21. Battery Cover ( page 5)
-
Page 9: Ndicator
Inserting the Batteries The camera is powered by a rechargeable lithium-ion battery (Li-Ion 820 mAh). Open the battery cover. Slide the battery cover in the direction indicated by the arrow. Insert the batteries. Install the battery with the terminal facing inside the camera. Close the battery cover. -
Page 10: Card
Risk of explosion if battery is replaced by an incorrect type dispose of used batteries according to the instructions. Be sure to turn off the camera power before insert or remove batteries. Remove batteries if you will not be using them for a long time. The camera body may feel warm after extended use. -
Page 11: Emory
About Camera Memory This camera is equipped with internal memory. If the memory card is not inserted in the camera, all images and movie clips recorded by the camera will be stored in the internal memory. If the memory card is inserted, images and movie clips are stored on the memory card. - Page 12 Setting the Date & Time Turn the power on, and set the camera to the Setup Menu page 16). Select [ Date & Time]. to select [Date Press & Time] then press or the SET button to launch the submenu. Set date and time.
-
Page 13: Using The Lcd Monitor
Using the LCD Monitor The LCD monitor is used to compose images while recording, adjust settings and replay images. The following indicators may appear on the LCD monitor while recording or playing back images. REC mode Recording mode ( page 13) Shake warning ( page 19) Flash (... - Page 14 PLAYBACK mode Playback mode ( page 13) Battery ( page 5) Captured date & time Protect ( page 40) Voice memo ( page 30) Voice memo control ( page 30) File number / Total DPOF ( page 45) Storage media Resolution ( page 21) Recording info (...
-
Page 15: Tatus
Changing the LCD Status Press the SET/DISP button changes the LCD status as shown below: REC mode (A) OSD on (B) Guide line (C) OSD off Use the “Guide line” to compose images easily before shooting images. PLAYBACK mode (D) Full OSD (E) Basic OSD You cannot change the LCD status in the following situation: 。... -
Page 16: Turning The Power On And Off
Basic Operation Turning the Power On and Off Press the POWER button ( ) to turn on the camera in the REC mode. The power turns on, the lens extends and the LED lights in green. Press the PLAYBACK button ( ) to turn on the camera in the PLAYBACK mode. -
Page 17: Rec Mode And
Changing the Mode You can record images and voices in the REC mode. And using the PLAYBACK mode to replay, delete, or edit images on the LCD monitor. Switching between REC mode and PLAYBACK mode In REC mode, press the PLAYBACK button ( ) to switch to the PLAY mode. - Page 18 Display Title Description Portrait Blurring the background to focus on the subject. Snow Used for the beach or snow scenes. Fireworks Slow shutter speed to take fireworks exploding. Night Scene Shooting the subject while keeping the background night scenery. Kids Take a still image to capture moving kids.
-
Page 19: Using The Menus
Using the Menus When a menu is displayed, the four-way control and the SET button are used to make the desired settings. REC menu Turn the power on, and set the camera to the REC mode page 13). Open the REC menu. Press the MENU button ( ) to display the menu. - Page 20 Sharpness Off / B&W / Sepia / Negative / Red / Green / Blue Effect Date Stamp Off / Date / Date & Time Stabilizer Off / On Face Tracking Off / On Photo Frame Off / Frame 1 ~ 10 Digital Zoom Off / On AF Lamp...
- Page 21 Change the setting. or the SET ( ) button Press ( ) to select an option and press to apply the setting. Press the MENU ( ) button to close the menu. Setup menu list Menu Item Functions [Shutter]: Sets the shutter sound on and off. [Start-up]: Sets a type of the start-up sound.
-
Page 22: Menu Item
Menu Item Functions created” error or if you want to restart numbering, for example, after erasing all files. [Series]: Store the latest used file number no matter deleting files or inserting a new memory card. [Reset]: Reset file numbering each time the memory card is changed. -
Page 23: Recording Still Images
Basic Recording Recording Still Images Turn the power on, and set the camera to the REC mode page 13). Compose the subject on the monitor. Aim the focus area ( ) to the subject that you want to take. Half press the shutter button to focus the image. The focus area ( ) becomes green while in focus, then shutter speed ( ), aperture value ( ) and ISO value ( ) are displayed. -
Page 24: Resolution
Using the Q mode The Q mode provides a simplified camera interface. Larger icons and fewer controls make it easier to take pictures anytime, especially for the beginners and elder users. You can use only the basic settings in the Q mode: Flash: Auto / Red eye / Force on / Slow sync / Force off Macro: Off / On... - Page 25 Setting Image Size and Quality You can select lower image resolution and quality to decrease the image size to capture more images. Choose a suitable setting according to the desired image quality and purpose. For details, see page 15. Resolution Values Image Size Print Size 3264 x 2448...
-
Page 26: Quality 21
Using the Zoom Function Your camera has a combination of optical and digital zoom functions that allows you to zoom in on far away subjects or zoom out for a wide angle shot. The optical zoom is achieved by mechanically adjusting the lens of the camera. The digital zoom enlarges or shrinks the image using a software process. -
Page 27: Using The Flash
Using the Flash The flash is not only for taking pictures when there is insufficient light, but also when the subject is in shade or in backlight conditions. Press the flash button to cycle your camera through the various flash modes. The flash will not activate when continuous shooting or movie recording. -
Page 28: Using The Macro
Using the Macro Your camera is equipped with a macro function that allows you to focus on very close subjects. In macro mode you can focus on subjects 15 cm from the lens when in the maximum wide angle setting and 40 cm in the maximum telephoto setting. Turn the power on, and set the camera to the REC mode page 13). -
Page 29: Burst
Using the Self-timer & Burst Use the self-timer to set a delay from the time the shutter button is pressed to the time the image is shot. Use the burst to record continuous still images shooting. Turn the power on, and set the camera to the REC mode ( page 13). -
Page 30: Riority
Using the Aperture Priority In this mode, you can set an aperture value to match the brightness. A higher aperture value brings the background out of focus. Selecting a lower aperture value allows you to soft the background. Turn the power on, and set the camera to the Aperture Priority page14). -
Page 31: U Sing The M Anual E Xposure
Using the Manual Exposure You can manually set the shutter speed and aperture to achieve a particular effect. Turn the power on, and set the camera to the Manual Exposure page14). Use the SET button to switch between aperture value and shutter speed control. -
Page 32: Movie Size
Recording Movie Clips Turn the power on, and set the camera to the Movie mode page 13). Compose the subject on the monitor. Aim the focus area ( ) to the subject that you want to take. The LCD monitor displays the available recording time ( ). -
Page 33: R Ecording A Udio C Lips
Recording Audio Clips Turn the power on, and set the camera to the Voice REC mode page 13). Press the shutter button ( ) to start recording. The voices are recorded from the microphone ( ) of the camera. Be careful to avoid touching the microphone while recording. -
Page 34: Emo
Recording a Voice Memo You can add a voice memo to the still images after you record it. Turn the power on, and set the camera to the PLAYBACK mode page 13). Press to select a still image that you want to add a voice memo. -
Page 35: Other Recording Functions
Other Recording Functions Setting the Metering There are 3 different light metering options available on your camera. Option Description Light is measured from the entire shooting screen, but gives more importance to the values near the center. Selects an exposure based on readings from multiple points in the subject area. -
Page 36: S Etting The Iso
Setting the ISO With the initial settings, the ISO sensitivity is automatically set according to the brightness of the subject. Option Description Auto Sets the ISO sensitivity automatically. ISO 50 Sets the sensitivity to ISO 50 equivalent. ISO 100 Sets the sensitivity to ISO 100 equivalent. ISO 200 Sets the sensitivity to ISO 200 equivalent. -
Page 37: S Etting The S Harpness
Setting the Sharpness You can select whether you want the image to have sharp or soft outlines. Option Description The edges of the image are emphasized. The edges will become sharp, but noise may occur in the recording image. The edges of the image are sharp. This is suitable for printing. The edges of the image are softened. -
Page 38: S Etting S Tabilizer
Setting Stabilizer With more sensibility and faster shutter speed to bright up the pictures, effectively prevent blur image caused by hand shack or target movement, one can take good pictures with little effort. Setting Face tracking After initializing face tracking function, the lens will lock the main character in the picture and follow the movements. -
Page 39: Playing Back Image
Playback Playing Back Images Turn the power on, and set the camera to the PLAYBACK mode page 13). The latest recorded image appears on the LCD monitor. If there are no images stored, a message [No image] appears. Press the four-way control ( ). - Page 40 Magnifying & Trimming Still Images Turn the power on, and set the camera to the PLAYBACK mode page 13). Select an image. Press ( ) to select the image that you want to magnify or trimming. Only still images can be magnified and trimmed.
-
Page 41: V Iewing In T Humbnail
Viewing in Thumbnail Turn the power on, and set the camera to the PLAYBACK mode page 13). Press the zoom button [W], a thumbnail screen is displayed. Use the four-way control to select the desired image, and press [T] or the SET button to show the selected image in full screen. -
Page 42: Deleting Files
Playing the slide show. Press the SET button ( ) to start the slideshow. During the slideshow, press the SET button ( ) to pause the slideshow and press the SET button again to resume. Deleting Files Deleting a Single File Turn the power on, and set the camera to the PLAYBACK mode page 13). -
Page 43: Deleting Multiple Files
Deleting Multiple Files Turn the power on, and set the camera to the thumbnail screen page 37). Open the menu. Press the MENU button, then Press to select to select Delete ( ) and press the SET button. Press to select [Select], and then press the SET button. The frame of the selected image turns green. -
Page 44: Protecting A Single File
Press to select [ALL], and then press the SET button. Press the SET button to delete all unprotected images. Protecting a Single File Turn the power on, and set the camera to the PLAYBACK mode ( page 13). Open the menu. Press the MENU button, then use the four-way control to select Protect ) and press the SET button. -
Page 45: Protecting Multiple Files
Press to select [Lock all], and then press the SET button. To unlock all files, select [Unlock all] in this step, then press the SET button. Press the SET button to protect all images. Protecting Multiple Files Turn the power on, and set the camera to the thumbnail screen page 37). -
Page 46: Editing Images
Editing Images Rotating Still Images Turn the power on, and set the camera to the PLAYBACK mode page 13). Press to select the image you want to rotate. Open the menu. Press the MENU button, then use the four-way control to select Rotate ) and press the SET button. -
Page 47: Changing The Image With Effects
Changing the Image with Effects Turn the power on, and set the camera to the PLAYBACK mode ( page 13). Press to select the image you want to add the effect. Open the menu. Press the MENU button, then use the four-way control to select Effect ) and press the SET button. -
Page 48: Copying The Files
Copying the Files You may copy the data from the camera’s internal memory to the memory card for convenience. Be sure you have inserted a memory card into your digital camera. Set the camera to the PLAYBACK mode. ( page 13). Open the menu. -
Page 49: Setting The Dpof
Setting the DPOF The Digital Print Order Format (DPOF) setting allows you to select images on the memory card for printing and specify the number of print copies in advance using the camera. This is extremely convenient for sending the images to a photo developing service or for printing on a direct print function compatible printer. -
Page 50: Choosing A Startup Image
Choosing a Startup Image Turn the power on, and set the camera to the PLAYBACK mode page 13). Open the menu. Press the MENU button, then use the four-way control to select S.Image ) and press the SET button. Press to select the image you want, then press the SET button to apply the choice. -
Page 51: Making Connections
Making Connections Connecting the Camera to a TV You can display recorded images on a television with a supplied AV cable. Set the TV out to match the TV system that you are using ( page 18). Turn off the camera and the TV. Use the supplied AV cable to connect the camera to the TV set. -
Page 52: Connecting The Camera To Apc
Connecting the Camera to a PC There are two ways to download files from the camera’s internal memory or memory card to a computer: Inserting the memory card into a card reader Connecting the camera to a computer using the supplied USB cable Using the Card Reader Eject the memory card from the camera and insert it in a card reader that is... -
Page 53: Appendix
Appendix About the Folder & File Name Your digital camera automatically creates a directory of folders in the internal memory or memory card that it uses to organize still images, movie clips and other information. Folder Structure Folder name begins with a 3-digit number from 100 to 999 and followed by “DICAM”, each folder holds up to 9999 files. -
Page 54: Troubleshooting
Troubleshooting Problem Cause Solution Power does not turn on. Battery is inserted in the wrong Reload battery in the correct direction. direction. Batteries are dead. Replace or recharge batteries. The battery compartment door Make sure the battery is open. compartment door is securely closed. -
Page 55: Specifications
Specifications Sensor 8 Mega Pixels CCD, Size : 1/2.5 inch Lens Focal Length : f = 6.2 ( W ) ~ 18.6 ( T ) mm , 3X optical zoom, 4X digital zoom LCD monitor 2.5” LCD monitor Focus Range Normal: 40 cm ~ Infinity ( from the tip of barrier ) Macro: (W) 15 cm ~ 1m / (T) 40 cm ~1m ( from the tip of barrier ) Aperture... -
Page 56: Function Available List
Button Menu Shutter & Lens... - Page 57 Menu...
- Page 58 Menu...
- Page 59 Menu...
- Page 60 Menu...
- Page 61 Menu...
- Page 62 RCP-Technik GmbH & Co. KG Tarpen 40/Gebäude 6b D-22419 Hamburg Hotline +49 (0)6 31/3 42 84 49 welcome @ rcp-technik.com www.rcp-technik.com Subject to technical changes!