10 % OF YOUR SHOPPINGS NET PROFIT WILL BE DONATED TO THE RECENT EARTHQUAKE VICTIMS OF TURKEY...
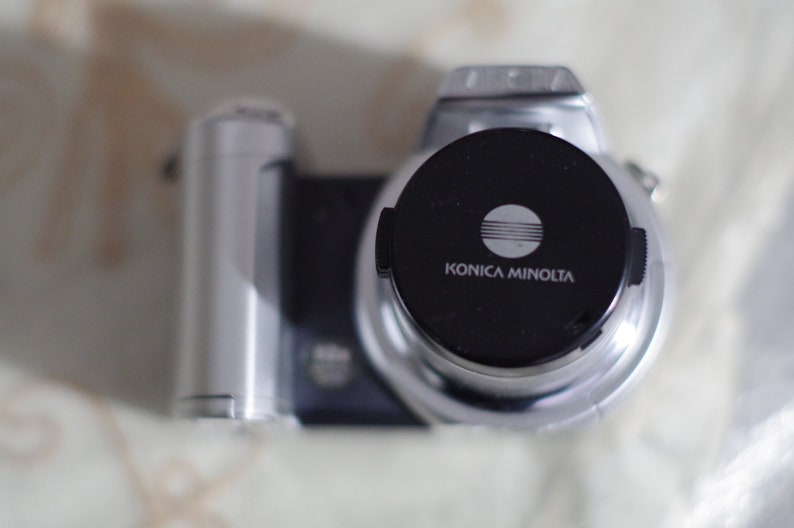
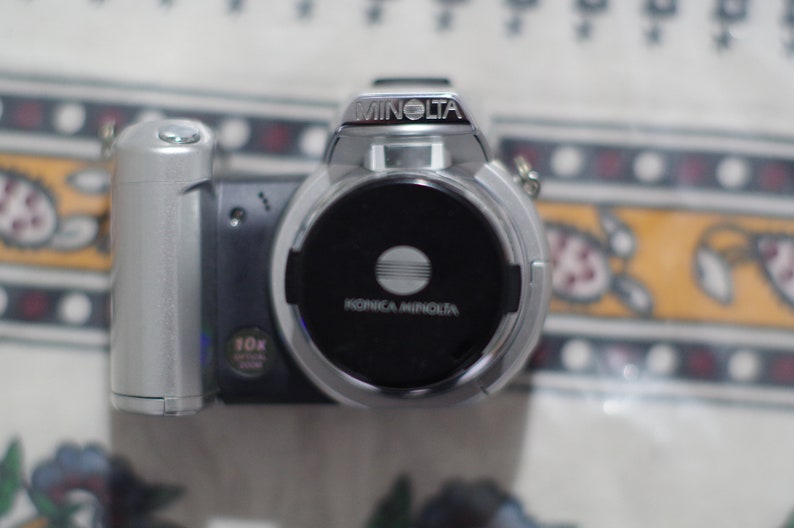
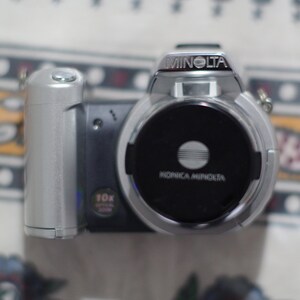
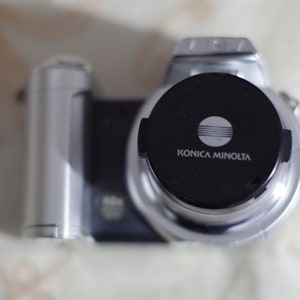
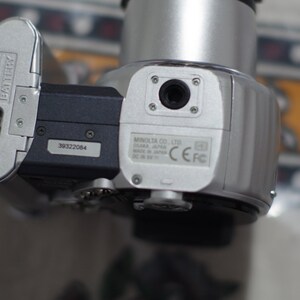
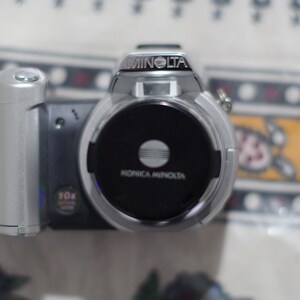
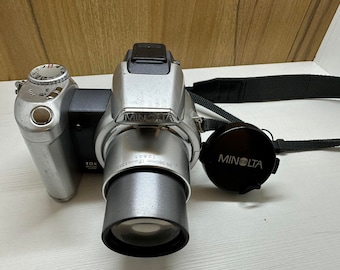
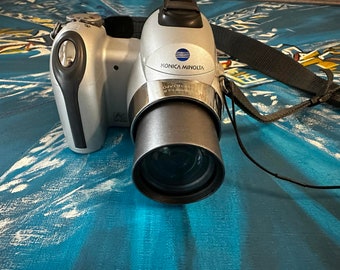
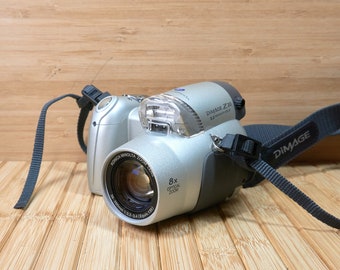
KONICA MINOLTA'S ONE OF THE BEST LEGENDARY DIGITAL CAMERAS DIMAGE Z1 IS FOR SALE FOR AN EXCELLENT PRICE. THIS CAMERA LOOKS, FUNCTIONS AND WORKS LIKE A BRAND-NEW CAMERA. MOST OLD AND CURRENT USERS ARE VERY HAPPY WITH ITS PHOTOGRAPHY QUALITY. THIS PARTICULAR CAMERA TESTED AND WORKING!
SOME INFO ABOUT DIMAGE Z1:
Basic Features
3.2-megapixel CCD.
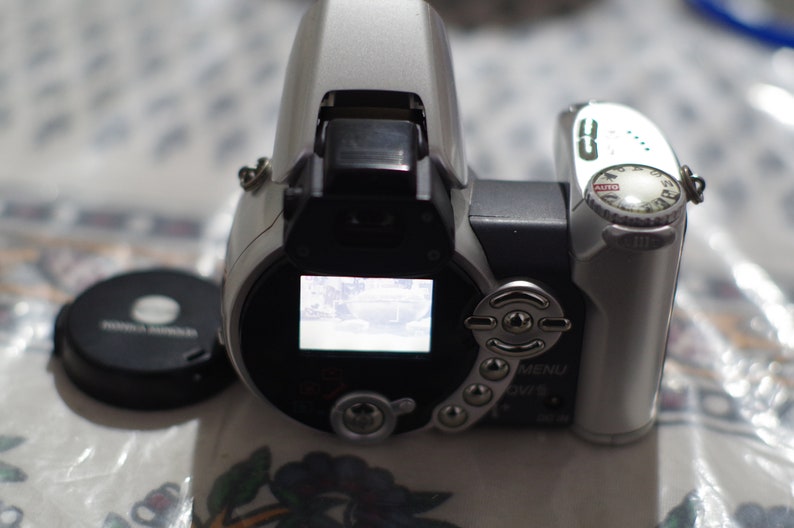
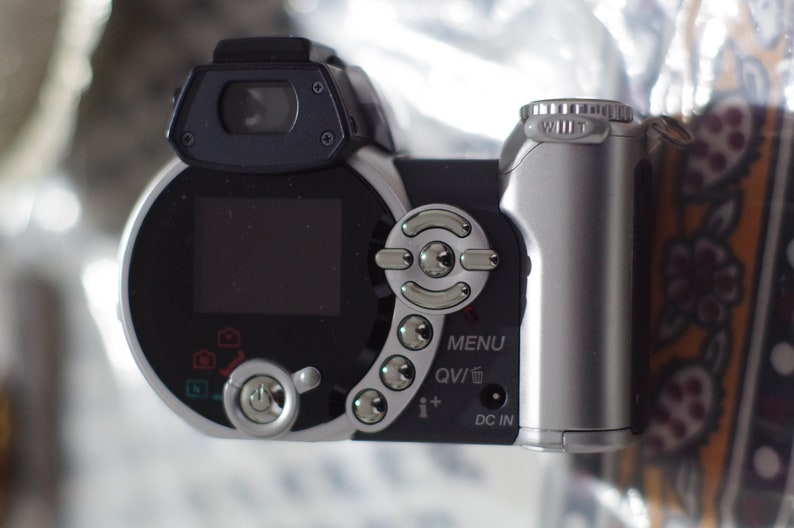
Electronic optical viewfinder (EVF).
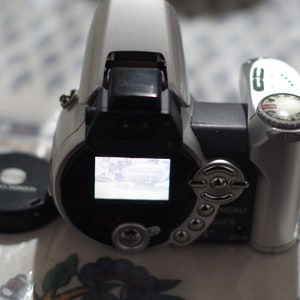
1.5-inch color TFT LCD monitor with anti-reflection coating.
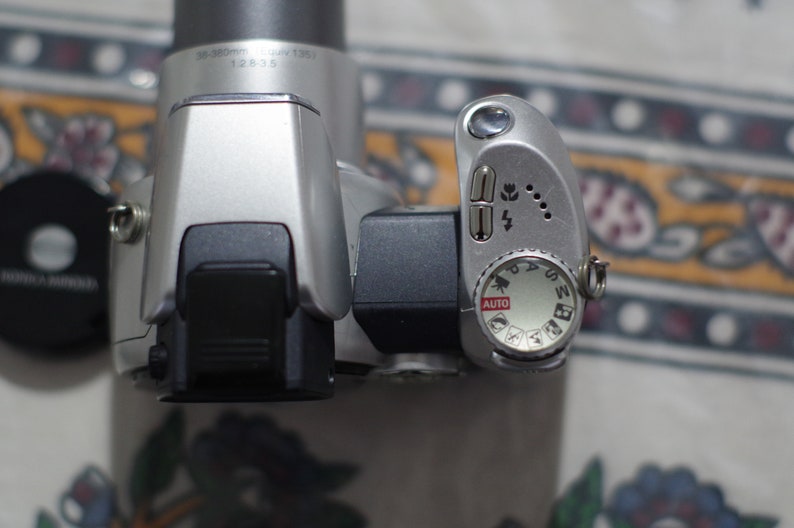
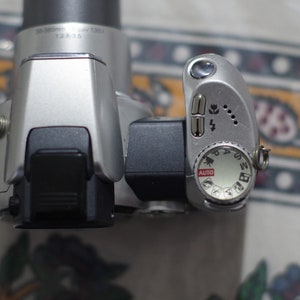
10x, 5.8-58mm lens, equivalent to a 38-380mm lens on a 35mm camera.
4x digital zoom.
Automatic, Program AE,Aperture Priority, Shutter Priority, and Manual exposure modes, plus five preset Digital Subject Program modes.
Shutter speeds from 1/1,000 to 15 seconds, with a Bulb setting for exposures as long as 30 seconds.
Maximum aperture f/2.8 to f/3.5, depending on lens zoom position.
Built-in flash with five modes.
External flash hot shoe for Minolta accessory flash units.
Images saved as JPEG files.
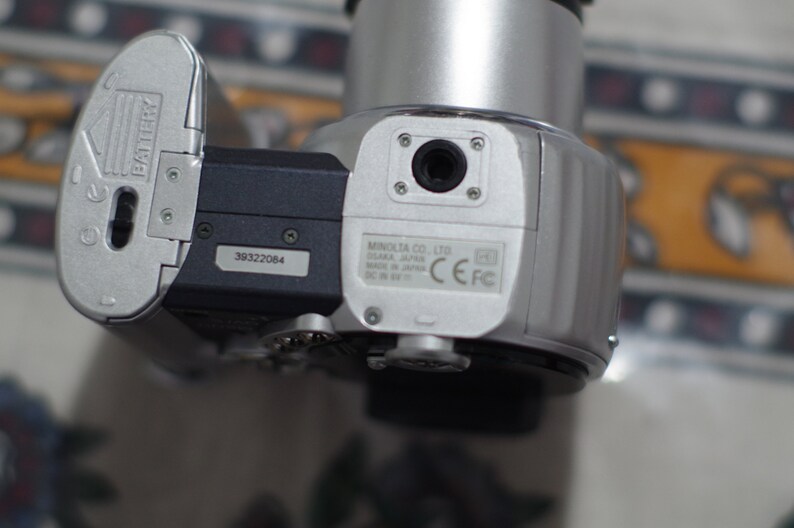
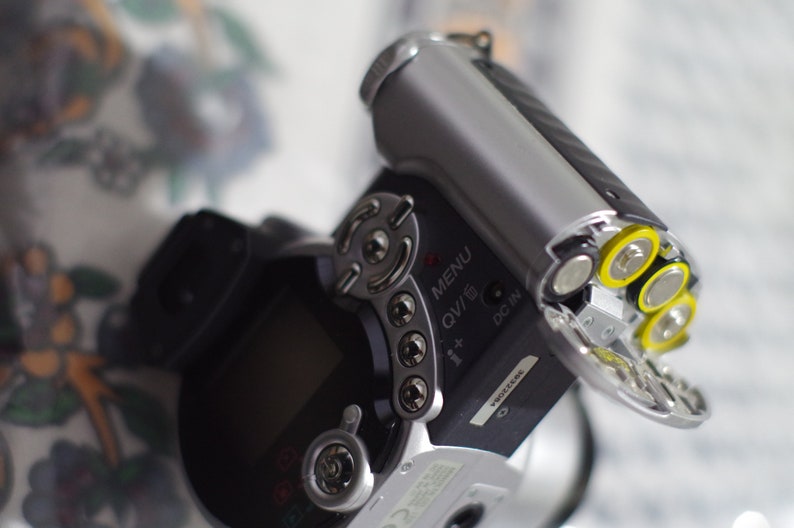
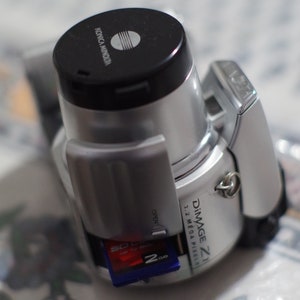
Power supplied by four AA-type batteries or optional AC adapter.
Special Features
Movie and Night Movie modes with sound recording.
Standard and Ultra High Speed Continuous Advance shooting modes.
Auto Exposure Bracketing.
10-second Self-Timer for delayed shutter release.
Voice Memo mode for recording captions.
White balance (color) adjustment with seven modes, including a manual setting.
Adjustable ISO with four sensitivity settings and an Auto mode.
Noise reduction setting for long exposures.
Multi-Segment, Center-Weighted, and Spot metering options.
Spot and Full-time AF modes.
Color, Sharpness, and Contrast adjustments.
USB Direct-Print capability.
External Controls
Shutter Button: Angled down slightly on the camera's top panel, this button sets focus and exposure when pressed halfway, and fires the shutter when fully pressed.
Macro Button: Behind the Shutter button on the top panel, this button controls the macro focus mode, cycling between normal AF, Macro, and Super Macro modes.
Flash Button: Following the Macro button, this button cycles through the available flash modes in any Record mode. Options include Auto, Red-Eye Reduction, Fill Flash, Suppressed, and Slow-Sync.
Exposure Mode Dial: Sitting atop the back edge of the handgrip, this ribbed dial controls the camera's exposure mode with the following options:
Auto: Puts the camera in charge of all the exposure variables, including aperture and shutter speed. The user controls only flash mode, zoom, macro mode, and file size and quality settings.
Movie: Indicated on the Exposure Mode dial by a black film camera icon, this mode records moving images with sound.
Program AE (P): This mode puts the camera in control of aperture and shutter speed, the user retaining control over all other exposure variables.
Aperture Priority (A): Here, the user controls the aperture setting, while the camera selects the best corresponding shutter speed.
Shutter Priority (S): The opposite of Aperture Priority mode, this mode lets the user choose the shutter speed setting while the camera selects the lens aperture.
Manual (M): This mode provides complete user control over the exposure.
Night Portrait: Marked on the Exposure Mode dial with an icon of a person with a star above them, this mode sets up the camera for capturing portraits in low-lit situations. Because the camera is using a slower shutter speed here, a tripod is recommended for the best results.
Sunset: Indicated by a beach scene with a setting sun on the Exposure Mode dial, this mode adjusts the white balance system to preserve the the warm colors of a sunset without compensating for them. It also biases the exposure system to produce a slight underexposure, to prevent the sky colors from being washed out.
Landscape: This mode is indicated by an icon of a pair of mountains with a person in front on the Exposure Mode dial. Here, the camera uses a smaller lens aperture, so that both the background and foreground will be in sharp focus.
Sports Action: Marked on the Exposure Mode dial by an icon of a running person, this mode uses faster shutter speeds to "freeze" fast-paced action.
Portrait: An icon of a woman's head indicates this mode on the Exposure Mode dial. In Portrait mode, the camera employs a larger lens aperture setting, which decreases the depth of field. This produces a sharply focused image of the subject, in front of a slightly blurred background.
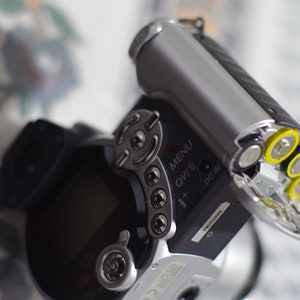
Zoom Control: Crowning the top right corner of the rear panel, just beneath the Exposure Mode dial, this two-way rocker button controls the optical and digital zoom in Record mode. In Playback mode, this button controls the playback zoom setting, digitally enlarging the image as much as 6x.
Four-Way Arrow Pad and OK Button: Roughly centered on the camera's rear panel, this set of five buttons serves as the camera's main navigational tool. The four exterior buttons navigate through settings menus, moving the selection up, down, left, or right. The center button acts as the "OK" button, to confirm any changes. In Manual exposure mode, the right and left keys adjust the aperture setting, while the up and down keys change the shutter speed. In Aperture and Shutter Priority modes, the up and down keys adjust the available exposure variable, while the right and left keys adjust Exposure Compensation. In Program AE mode, the right and left keys adjust the Exposure Compensation as well. In Manual Focus mode, the up/down arrow keys adjust the focal distance of the lens.
In Playback mode, the right and left arrow keys scroll through captured images. The up arrow key calls up or dismisses a display screen showing a histogram of brightness values within the image, as well as detailed exposure information. When an image has been enlarged, all four keys pan the view.
Menu Button: Directly below the down arrow key and the first in a series curving around the LCD monitor, this button calls up the settings menu in both Record and Playback modes.
QuickView / Erase: Below the Menu button, this button activates the QuickView image display in Record mode, which allows you to check the most recently captured image.
In Playback mode, this button displays the Single Image Erase menu, which lets you erase the currently displayed image.
Display (i+) Button: The final button in the series curving around the LCD monitor, this button controls the LCD display. In Record mode, pressing this button toggles the image information display on and off.
In Playback mode, pressing the Display button displays or dismisses a limited information display. A third press switches to an index display of thumbnail images for rapidly reviewing photos in the camera, while a fourth press returns to the normal display.
Power Button: Located in the center of the Mode dial beneath the LCD monitor, this button turns the camera on and off.
Mode Dial: Encircling the Power button on the rear panel, this dial sets the camera's operating mode and viewfinder display location. Options are Record EVF, Record LCD, and Playback.
Diopter Adjustment Control: Tucked on the side of the viewfinder eyepiece, this tiny, notched dial adjusts the viewfinder display to accommodate near- or farsighted users.
Camera Modes and Menus
Record Mode: In Record mode, the camera can capture still images, with a range of options available through the settings menu. The Exposure Mode dial sets the exposure control mode, while the LCD menu provides the following exposure options (some options are not available in all modes):
Record 1
Drive Mode: Sets drive mode to Single, Self-Timer, Continuous, Progressive, or Bracketing.
Image Size: Adjusts the image resolution to 2,048 x 1,536; 1,600 x 1,200; 1,280 x 960; or 640 x 480 pixels. In Movie mode, resolution options are 640 x 480; 320 x 240; and 160 x 120 pixels.
Quality: Specifies the JPEG compression level for still images. Options are Fine, Standard, or Economy.
Frame Rate: (Movie mode only.) Sets the movie recording frame rate to 15 or 30 frames per second.
Audio: (Movie mode only.) Turns audio recording on or off.
White Balance: Adjusts the overall color balance of the scene. Options include Auto, Preset (Daylight, Cloudy, Incandescent, and Fluorescent), Custom Set (manual adjustment), and Custom Recall.
Key Function: Assigns a function to the Right and Left Arrow keys. Options are Exposure Compensation (default), Flash Mode, Drive Mode, White Balance, Focus Mode, and Color Mode.
Movie Mode: (Movie mode only.) Sets the movie recording mode to either Standard or Night Movie. (Night Movie mode uses slower shutter speeds to cope with dim lighting conditions, but as a result will produce blurred images of quickly moving objects.)
Record 2
Focus Mode: Selects either Auto or Manual focus control.
Full time AF: Turns the Full time AF option on or off. If on, the camera adjusts focus continuously whenever the camera is in a capture mode.
Flash Mode: Sets the flash mode to Auto, Red-Eye Reduction, Fill, Fill with Red-Eye Reduction, or Slow Sync modes.
Flash Compensation: Adjusts flash power from -2 to +2 exposure equivalents (EV).
Metering Mode: Designates how the camera meters the exposure. Options are Multi-Segment and Spot.
Custom 2
Sensitivity: Sets the camera's sensitivity to Auto, or to 50,100, 200, or 400 ISO equivalents.
Digital Zoom: Turns the 4x digital zoom on and off. (Digital zoom only engages after the lens has been zoomed all the way to its max telephoto.)
Color Mode: Chooses whether the camera records images in Natural Color, Vivid (highly saturated) Color, Black and White, or Sepia tones.
Sharpness: Adjusts the in-camera image sharpening. Options are Normal, Hard, and Soft.
Contrast: Controls the level of image contrast, with choices of Normal, High, and Low.
Playback Mode: This mode allows you to review captured images on the memory card, erase them, protect them, set them up for printing, etc. Pressing the Menu button displays the following options:
Playback 1
Delete: Erases the current frame, all frames, or marked frames from the memory card.
Format: Formats the SD/MMC memory card.
Lock: Write-protects specific images or all images, preventing them from being manipulated or erased (except via card formatting). An option also exists to Unlock images.
Playback 2
Slide Show: Enables an automated slide show of all the images saved on the memory card.
Slide Show Playback: Specifies which images are played back in the slide show, either All Frames or Marked Frames. (The Marked Frames option lets you "mark" frames for playback.)
Slide Show Duration: Determines the interval length between images, from one to 60 seconds.
Slide Show Repeat: Sets whether the slide show repeats after the last image or not.
Playback 3
DPOF Set: Allows you to set up images for subsequent printing on a DPOF (Digital Print Order Format)-compliant output device. You can select individual images, or mark all images on the card for printing. You can also cancel print settings.
Index Print: Turns the Index Print function on or off. If on, a DPOF printer will print an index page of all images on the memory card.
Copy: Makes a copy of the currently-displayed image, or marked frames on the card.
Email Copy: Makes a low-resolution copy of the selected image. You can make copies of either the current image alone, or of multiple images you've marked separately. Email copy images are stored in a separate "EM" folder on the memory card. (This is a fairly rare and very handy option, although I somewhat prefer Sony's implementation of it, in which the camera will can be set to automatically make email-sized copies of all images as they're captured.)
Email Copy Image Size: Sets the Email Copy size to 640 x 480 or 160 x 120 pixels.
Setup Mode: The following Setup menu options are accessible through both the Record and Playback menu screens, as a separate tab on the far right:
Setup 1
LCD Brightness: Adjusts the brightness of the LCD display.
Power Save: Sets the camera to shut itself off after 1, 3, 5, or 10 minutes of inactivity.
Instant Playback: Turns the Instant Playback function on or off, which displays an image immediately post-capture. If enabled, the review time can be set to two or 10 seconds.
Lens Accessory: Specifies whether a lens accessory is in use.
Language: Changes the menu language to Spanish, French, German, French, English, or Japanese.
Setup 2
File # Memory: Specifies whether file numbering starts over when a card is reformatted, or a new card is inserted, or whether the numbering continues sequentially regardless of card status.
Folder Name: You can have the camera name the folders it stores its images in on the memory card using either the camera's standard scheme, or by Date. (The latter being a handy way to keep track of photos you've shot over a period of time.)
Audio Signals: Turns the camera's beep sounds on or off. You can select between a beep sound or a click sound.
Shutter FX: Specifies the sound the shutter makes when the Shutter button is pressed, or disables the shutter sound.
Volume: Sets the playback volume to 1 (low), 2, or 3 (high).
Setup 3
Reset Default: Resets all camera settings to their defaults.
Noise Reduction: Turns Noise Reduction on or off. If on, Noise Reduction is automatically enabled at slower shutter speeds.
Date Time Set: Sets the camera's internal calendar and clock.
Date Imprint: Turns the date imprint function on or off, overlaying the date on captured images when enabled.
Setup 4
Video Output: Selects the video signal timing as either NTSC or PAL.
PRICE GUIDE:
https://www.amazon.com/Minolta-Dimage-3-2MP-Digital-Camera/dp/B0000BYODE